Told my wife I would build the kids some Ukuleles for Christmas. At first I was going to make CB style bodies out of plywood and simple necks. A new Rockler store opened nearby and one thing led to another… I used the X-Carve to make all the forms and a bunch of jigs for glue-up. I also used it to make parts for a 16" thickness sander (in addition to parts from our old washing machine). One of my favorite things was the ease of making inlays using the inlay generator and a laser I bought on Ebay for cheap to cut veneer. Once I dialed in the right offsets the veneer snapped in perfectly. I’m going to build some more and make some tweaks for tighter fits but all in all I’m happy with how the project turned out (and more importantly, so are my wife and kids). Intonation is spot on and they sound great!
-For those experienced Luthiers who will take notice of the types of wood I used that are not ‘tonewoods’, please remember these are for kids, not professional Ukulele players!
Uploading…
<img src="//discuss-
25 Likes
Awesome work!! They look great.
These are super cool! Could you describe how you bend your sides and shaped the necks?
these are awesome! Great job!
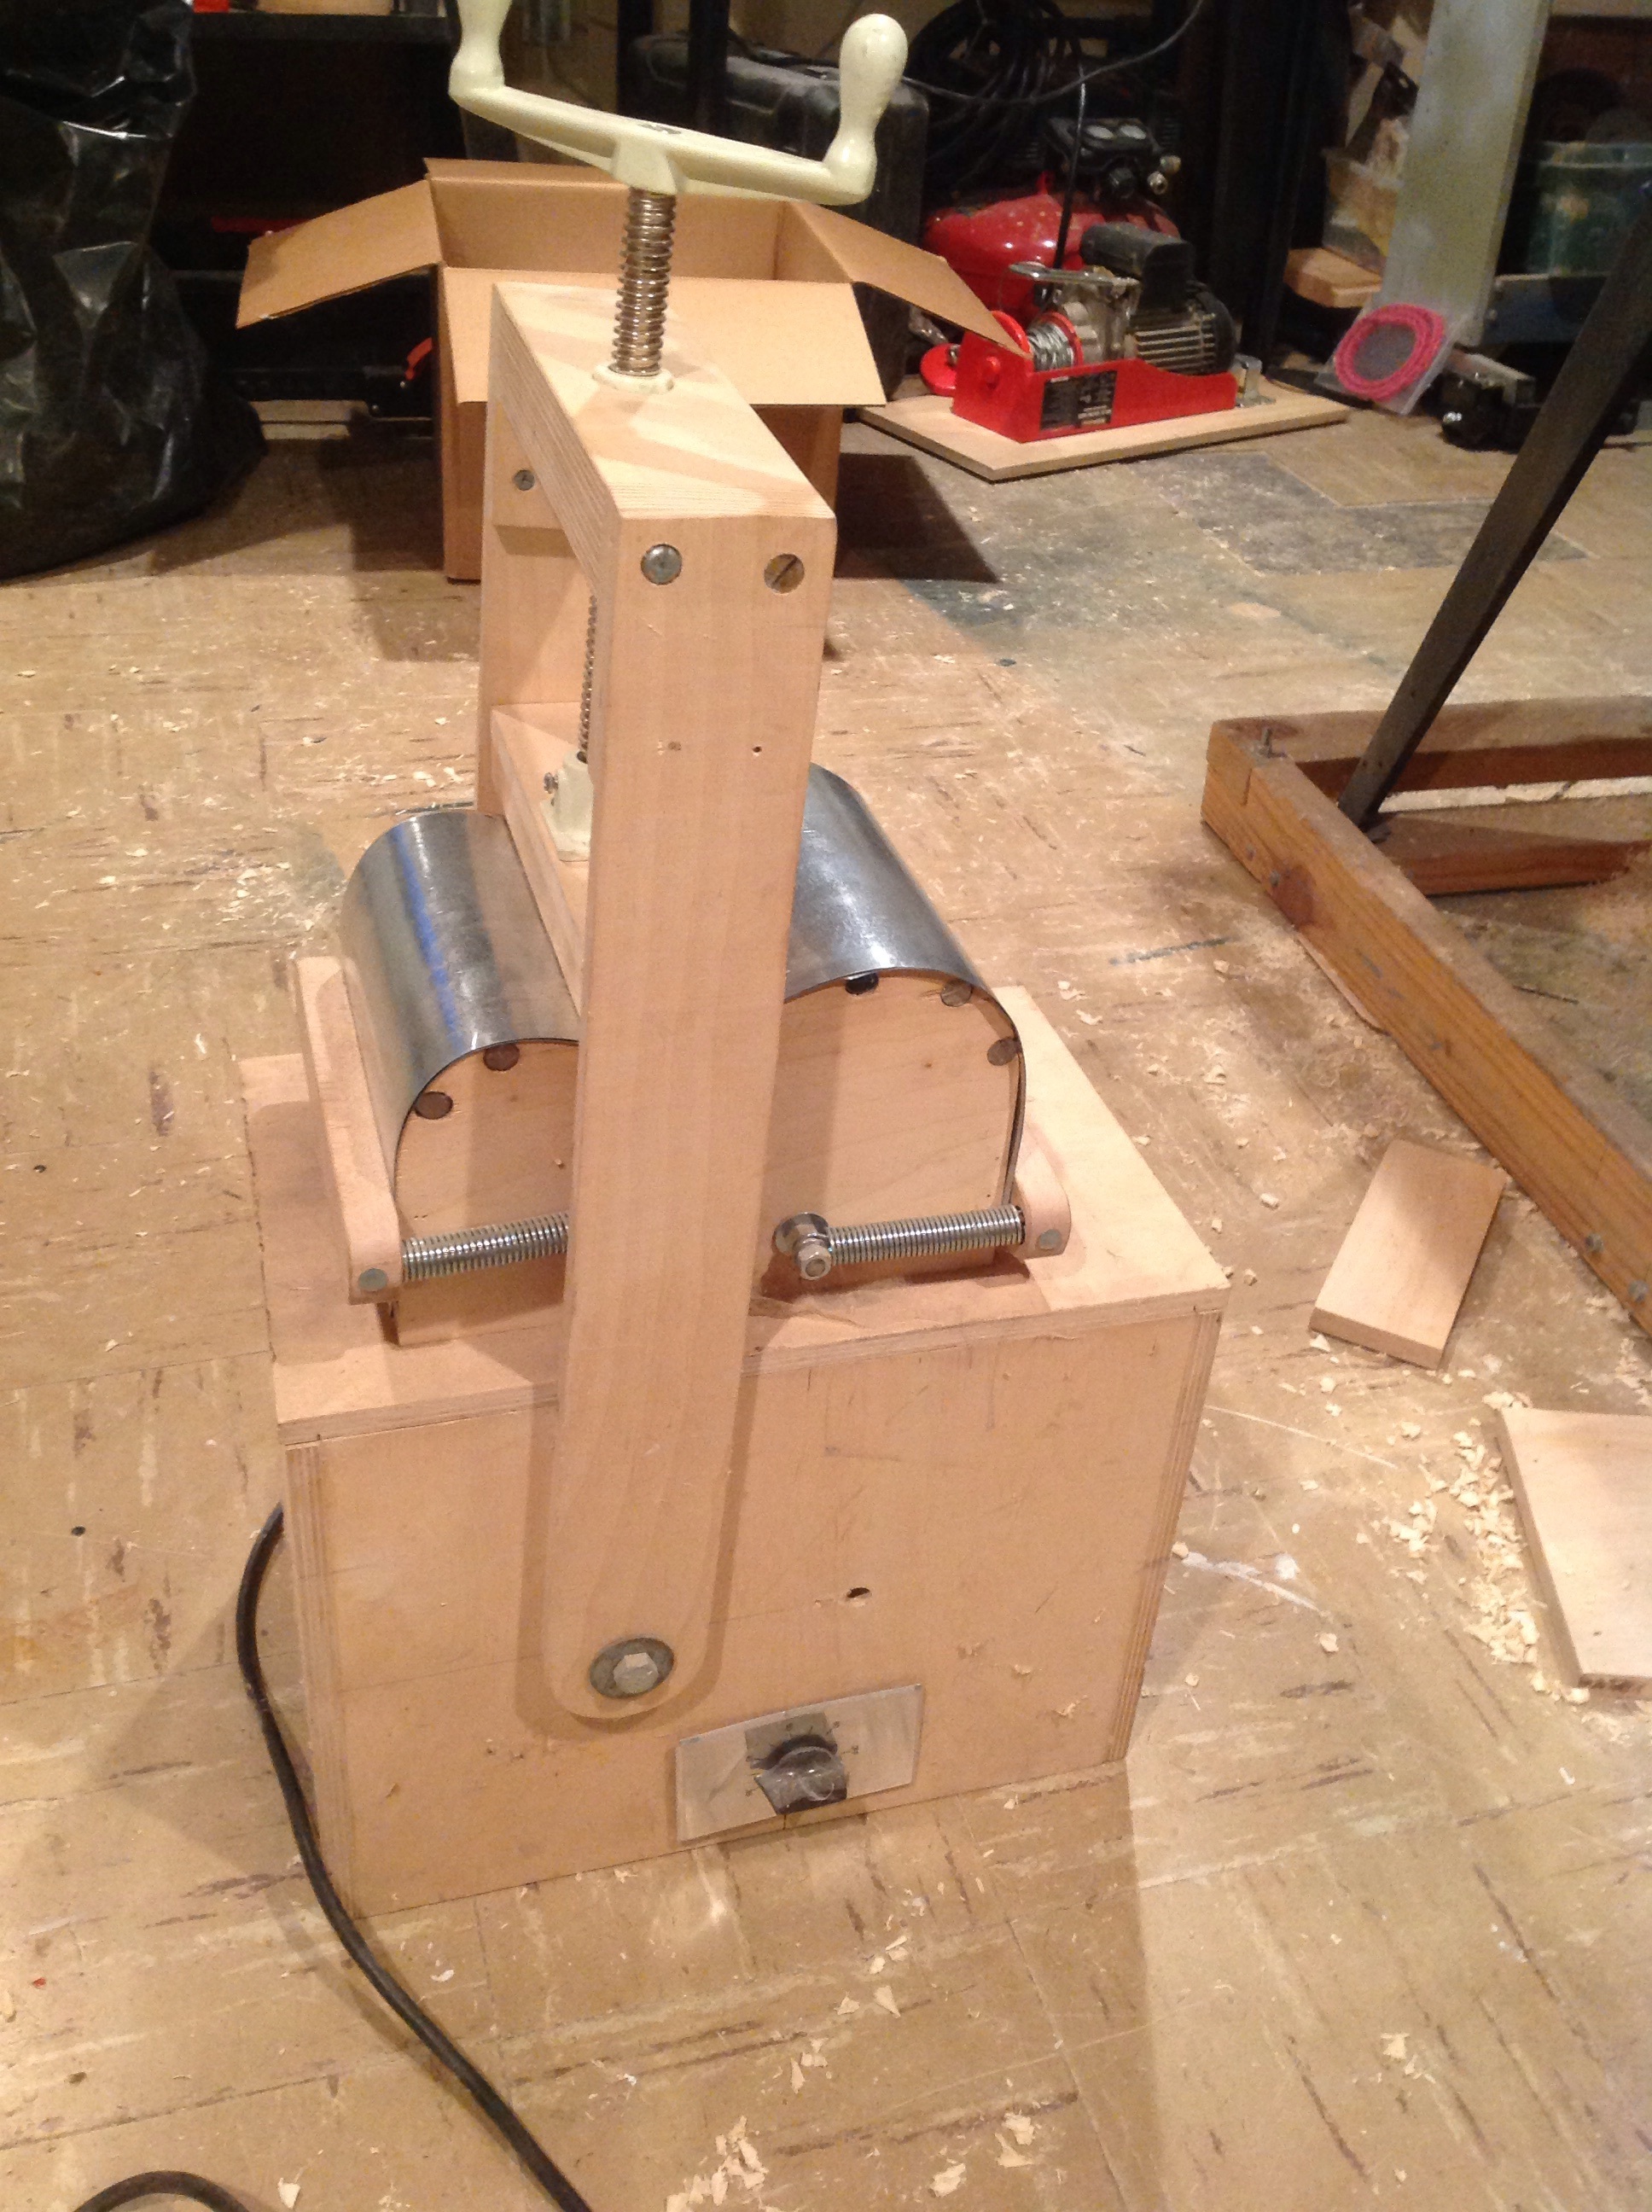
Here is how I bend my sides. It’s
heated by light bulbs. note the metal bars.
1 Like
I made a very crude bending iron using a piece of aluminum pipe and a 150w light bulb. I sprayed the sides with water and wrapped them in foil. The one that @BrianPalmer created below is MUCH better. I’ll be using something like that for the next ones. Here’s a pic of mine:
I cut the neck taper on the table saw with a jig I made. I didn’t do much shaping on the necks, just used a quarter-round bit (I hope the kids won’t be picky about the neck profile). I shaped the parts of the headstock on my osc sander.
Looks much better and easier than what I used!
The bending jig and the heated post both look equally good for their own purpose. I would imagine the jig is best for producing a lot of sides consistently. The heated post while probably not as accurate is more versatile and faster to put together.
I just picked up some mahogany and a set of plans for a concert uke. Going to let the mahogany acclimate for a few weeks and do some research. @KevinCanterbury, those three ukes were pretty inspiring!
I have used both a homemade bending bar, stewmacs.coms bar, and the jig above. Using a bar takes acquired skill. It’s easy to accidentally partially straighten areas you have already worked on. Like the jig, sandwiching the wood between 2 metal straps helps trap the heat and steam and controls the pressure and in turn helps prevent breakage. It is very satisfying when you get the hang of it.
With the jig, something magic happens when the entire side is heated at the same time. It bends like butter and stays bent when pressure is released. It’s not my design. You can find images of similar jigs. The base is designed to accept different jigs. I planned to make one for a guitar but have not gotten around to it yet.
So I’ve gone and built my jigs. I went with a jig similar to yours, but the base is one piece rather than separate. What kind of bulbs are you using? I put a 150 and a 200w incandescent in and I can only get it up to 230 at the hottest. Placing a wet paper down on the jig surface drops the temp down 30 deg almost instantly and it doesn’t recover quickly even cranked up at full 350w. I’m concerned this isn’t hot enough to shape the sides.
Hi Rich. Sorry for the slow response. I am using two large clear 120 watt bulbs. They are a little larger than the standard light light bulb you would use in a lamp. They get hot enough that I had to line the inside of the box with sheet metal to prevent the wood from scorching. I think the sheet metal in combination with the steel rods helps a little with heat retention as well. It gets hot enough that I get a little wood scorching where the bars go through the plywood and a drop of water pops and sizzles when dropped onto the bender. But I do have to work very quickly when placing the uke sides in the bender or I lose too much heat and have to start the warming process over. The better way to control temp would be to use an electric silicon heating pad controlled by a thermostat. See http://www.ebay.com/itm/like/281694537732?lpid=82&chn=ps&ul_noapp=true for an example or search for Luther silicon heating pads.
And just when I thought I had seen everything… very ingenious…

No worries. Life gets in the way of fun sometimes 
I haven’t got water to sizzle on mine yet, and i’ve got more wattage in there, so I think the problem is my choice in metal. I tacked aluminum flashing (rather than spring steel) to the top hoping that it would conduct and transfer the heat well, but I think it’s heat dissipating properties are why I can’t get past 230 deg.
I moved forward with other parts for the time being. Yesterday I milled my rosewood fretboard down, and cut the inlay pockets and fret kerfs. Today, a bridge, and milling my back and sides down (solid sapele) to thickness. I don’t have a thickness sander, and I’m afraid my thickness planer is way too violent for planing down to 2mm.
I wish I had used spring steel for my bending straps. But went the cheap route and used galvanized steel flashing instead. As you can see it doesn’t spring back very well. To make the process of inserting the side wood faster and less fussy I ended up riveting one end of the bending straps right onto the form. That way I can concentrate on getting the side wood in and aligned correctly as fast as possible. I should mention that I make the side wood strips extra long so that I don’t end up short on one end after bending. I bend the waist first with the screw pressure. You should hear a nice sizzle as you apply pressure with the screw.
Then pull down the spring loaded wood bars on either end to bend the top and bottom portions.
I usually make my sides 3/32" thick. To achieve that I use a band saw to re-saw boards to 5/32" or so. Then use a thickness planer to get them down to 3/32". My thickness planer only goes down to 1/8" so I use double stick tape to attach the sides to a carrier board (mdf works well for this) and run then run carrier board through the thickness planer. An added benefit of using a carrier board is that it practically eliminates snipe. When done I use a putty knife to GENTLY and slowly pull the sides off the carrier board as the double stick tape can be quite sticky.