We use cookies to personalize content, interact with our analytics companies, advertising networks and cooperatives, and demographic companies, provide social media features, and to analyze our traffic. Our social media, advertising and analytics partners may combine it with other information that you’ve provided to them or that they’ve collected from your use of their services. Learn more.
I’m going to be building a 750x1500mm X-Carve with a modified Phil’s wasteboard and some rigidity impovements since I plan on doing quite a bit of Aluminum and Brass. The overall cutting area will be roughly 20x48" large enough for me to do 48" dresser fronts/furniture and longer signs.
After assembled, I’m going to build a sound/dust reducing enclosure (with vacuum cabinet) so that I can run this in my apartment as a way to make money on the side. I’m not new to CNC but I’m definitely new to X-Carve so I’m really excited!
I’ll be using this thread as my Build Log for the project, hope you enjoy
Day 1:
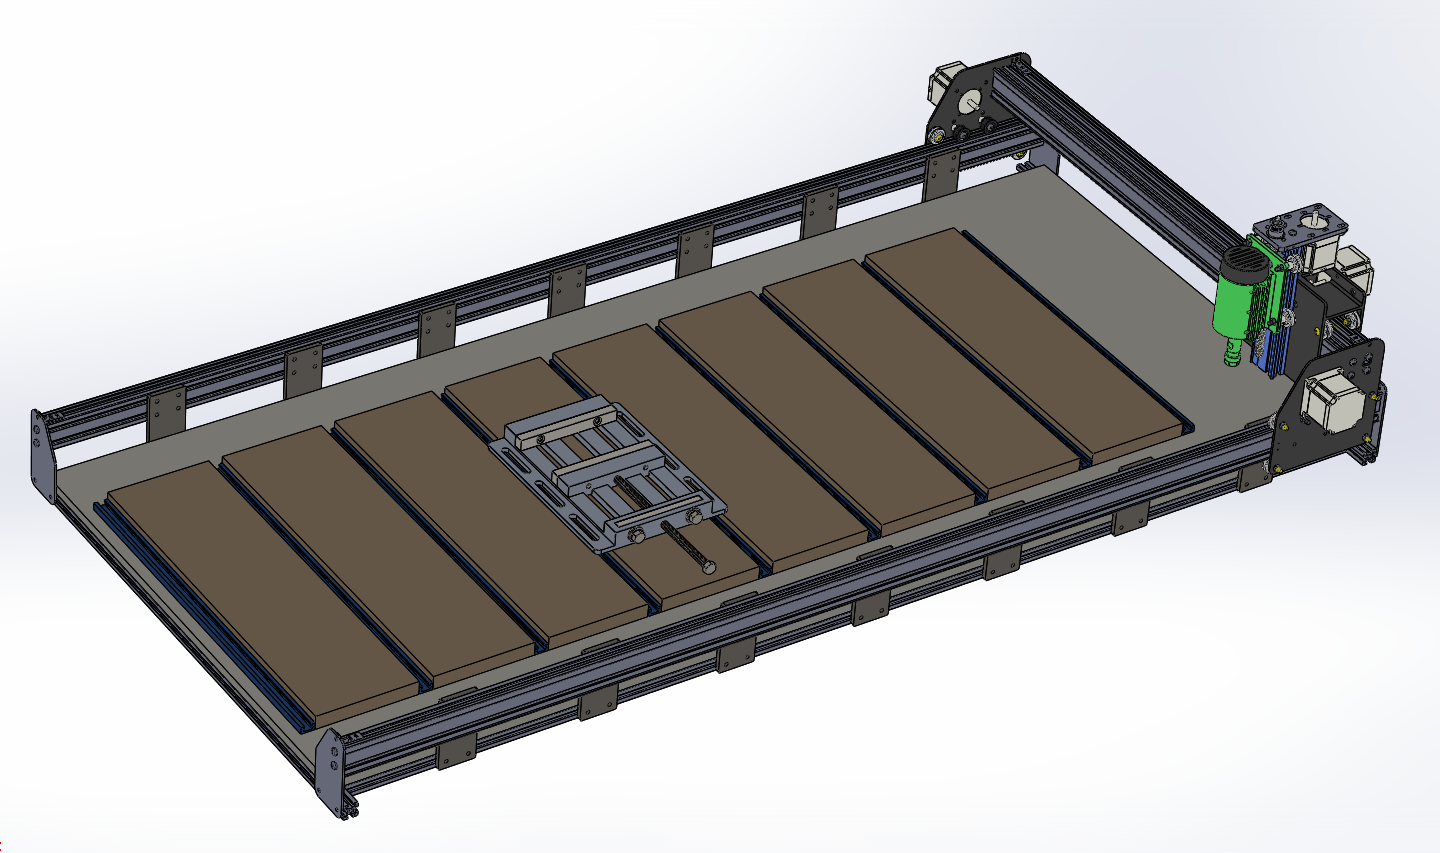
SolidWorks model of the layout.
My boss is letting me use our giant granite surface plate for the assembly to help improve accuracy and squareness.
While the brackets were drying I decided to get started on the X-Carve assembly. My wasteboard plate isn’t here yet, so I started with the gantry first. Was able to get most of the gantry finished except the dragchain rail and the Z axis motor. Time flew by and I realized it was 1AM and I’m still at work so… I’ll save the rest for tomorrow.
Limited space requirements. I live in a small apartment, and this was the largest I could feasibly get away with. I don’t have a garage or dedicated workshop so as much as I’d love to go full 1000x1800, this will be more friendly as a good sized apartment workstation. It will give me a cutting area of 20x50, that will handle just about everything I need for a long time.
My lasercut metal bed isn’t here yet so I got a little impatient and started assembling the frame. I realize that it will be a royal pain in the ■■■ to line up all the T-nuts to the bed later, but I figure since it’s being lasercut I can rely on spacing from my SolidWorks model to get it right quickly. 1500mm 20x40 Extrusions replacing the factory 710s. Those will get chopped into smaller pieces and installed later as spacers between the 1500 pieces to keep it square. Nothing gets wasted!
Cut the 1800mm Makerslides (Replaces factory 750s) on the miter saw and managed to hit 1540mm dead on. I chuckled a bit with how perfectly flush they were with the rest of the frame. Then Tapped the ends to 5mm-.8 for the endplates.
Here is the first glimpse at the basic frame, I have yet to install the spacers between the base rails cause I ran out of T-Nuts Gonna order more this weekend!
Absolutely. The brackets you saw me drilling and painting earlier will be supporting the Y axis rails. There will be 7 on each side. The only reason I didn’t install them yet is cause I ran out of T nuts and need to order more
This is an epic build @Austin. In the picture where you add the gantry it looks like a menacing droid bay from the Death Star in Star Wars except the yellow from the Dewalt would be black or white.
Small update today since I wasn’t able to get a whole lot done this weekend (thankgiving).
Got the X axis drag chain installed and wires run. I bought about 6 extra feet of stepper motor cable for each run, but I still have to figure out what to do about the homing switch and router cable. Also, I learned that the 1 meter drag chain they sell on the store (which i bought for the y axis) DOES NOT match the ones that come with the unit. I bought the “same size” one, but it is far thinner material and has no wire openings/clasps. It also doesn’t mount to the bracket they provide for the stock drag chain. So I’m gonna have to call customer service and figure something out.
I cut all of the stock 710mm extrusions that I replaced into a bunch of smaller pieces that I can use to strengthen the bottom frame. However, somehow I counted wrong again and ran out of extra gussets. So I’m ordering a bunch more this week.
Found some time on my lunch break to model a sideboard/dust cover as well as update the holes for my baseplate.
The reason I don’t have the baseplate yet is because one my work’s vendors is doing me a favor and tossing in my project onto the same job/setup for one of our work batches. That way they don’t have to charge me a setup fee. I originally got a quote for Aluminum, but they said they will be doing a batch of 1/4" steel for us very soon, and that turned out to be much cheaper. Soo… the baseplate is now 1/4" A36 steel plate xD (roughly 125lbs). Wasn’t my ideal setup, as the weight is a bit frightening, but the added mass will improve performance!
Here is an updated model including the dust covers.
Note: No, I will not be using all those holes in the dustcovers, those are there cause I was experimenting with hole placement. I’ll likely only use 3, knurled thumb screws for easy removal.
Here is my hole pattern layout. I tried to get it so that there was minimal overlap and evenly spaced as possible. There is one section (3rd wasteboard from left) where i’ll just have to make sure to use shorter screws. Which hopefully shouldn’t matter since the threads are now 1/4" steel plate.
Unfortunately the vendor requires that the holes being cut are the same diameter (or as close as possible) to the thickness of the material. So I will have to be drilling the holes for the T-Track by hand. Which may actually work for the best so that I can line the first one up perfectly as a parallel reference point for the wasteboards.
Thanks Cody! I’ve designed like 12 different enclosures at this point and I’ve never been truly satisfied with any of them. They’ve all ended up overly bulky and complex, or not very service friendly. I really don’t want a gargantuan ceiling-high enclosure so finding a way to keep it as compact as possible, service friendly, and easy to build has been challenging to say the least.
I’m hoping that the design I’m working on now will pan out. I’ll post photos of the designs once I’ve nailed it down.


 but i like the way you think!


 Gonna order more this weekend!


