Howdy- I have the chance to purchase a used xcarve. The owner is a solid guy and I trust his description of the machine. He says it’s a first gen machine with the Dewalt router. I have some experience with laser cutting (Glowforge) and vectors (mostly Inkscape) but have not done any cnc work. I think the price will be low enough so that I won’t feel obligated to use it to make money. I don’t mind tinkering, but I don’t want to spend 5 hours of repair work to do 1 hour of cutting every time. I also don’t have a of lot extra $ to upgrade right now, but perhaps later. I can do a lot with my laser, but I know I can do different and cool stuff with an xcarve. What advice do you all have? I tried to find info on the generations of machine but came up empty handed- are they are all backwards compatible to a point (meaning most of the main structure is the same between generations?). I also know it’s been sitting for a bit, anything hurt by that?
Thanks,
Sugi
I also have a Glowforge and a 2015 x-carve (upgraded to the x-controller). The basic workflow isn’t that different than the Glowforge, except you have a bit of mechanical stuff you now need to worry about, it’s a noisy beast (way noisier than the GF, particularly if you do dust control of some form - and you want to). I replaced the collet with a better collet on the DeWalt and have a 1/4” and 1/8” collet. You need to think a bit differently with the x-carve as you no longer have a tiny tool (laser) and to get into the tiny details you often need to rough with a larger tool (say a 1/8”) and then detail cleanup with a smaller tool (1/16 or 1/32”). As you learn, You’ll break some endmills. That’s just the cost of doing business, but they’re relatively cheap, and eventually you’ll use up the brushes on the DeWalt (normal consumable) costs $15 on amazon to replace and 5 minutes of your time… go watch some YouTube on Paw-Paw’s workshop(@PhillipLunsford) and you’ll get a good set of projects (he’s a great teacher on the basics and some really cool projects) which you can compare to using the GFUI (EASEL is the equivalent to the GFUI).
I’d start learning on some pine or 1/2’ MDF from Home Depot where when you screw up, and you will, it’s not a piece of exotic hardwood from some island that can only be reached on alpaca and costs $50 per foot.
Since its an older Xcarve, one aspect might be worth some attention, the gshield. Unless it comes with the Xcontroller which is a beefier and more approriate controller powerwise.
(4 drivers, one for each stepper and powerfull enough to take them to max)
The gshield is lacking in that regard.
(3 drivers, none powerfull enough to take them to the max and the Y-steppers share one)
Thanks! Good to hear the comparison with the Glowforge workflow.
Okay- that’s a big one. I’m guessing that’s one of the costly upgrades. I’ll check into the gshield issue. Thank you.
One. It caveat. Just like when I got the GF you don’t quite realize how big this thing is until it’s in your house. You think well it’s a meter-square, but in person it is big. It that is part of the appeal. You could easily put the GF in the x-carve footprint wise. I built a table from one of those kits that is super steady, and made my own dust collection using a dust deputy and my shop vac (without the dust deputy the shop vac clogs in a few minutes when carving MDF) and made my dust shoe on the Glowforge out of acrylic out of thick clear proofgrade acrylic.
If the machine doesn’t have an x-controller that’s a worthy upgrade. The older models like mine did suffer from a lot of flex in the x-axis arm (there are cheap and easy stiffening tips (I did the bolt trick back in 2016 and it worked well and cost $5 and 15 minutes of my time.
Most people are doing 2.5D operations on it (like the Glowforge) so the good news is all your design tools (whatever they may be) are the same, and the concepts of things like tiling designs all still work. You will need to learn about corner radius on your tab-slot designs (unlike the laser you can’t cut a true sharp inside corner it will always have the radius of the tool) which is easy to compensate for, but when coming from the laser world That takes some getting used to (technically it is true on the Glowforge as well, but you can’t see the radius of the laser dot)
Oh and get a good clamping set, so you aren’t frustrated, because unlike on the GF you are fighting real mechanical force rather than just the air-assist fan, so even heavy sheets of 3/4” ply would go flying without a clamp. The nice thing about this clamp set is that the hold downs are plastic (you can 3D print new ones) so when you cut accidentally through them (and you will) it’s not a lot of broken stuff. Event the aluminum supports won’t destroy most end mills (watch a video to learn how to use the support wedges)
Yeah somewhat costly (335?) and something to factor in on the prospect of buying the machine. However if you dont fear some DIY you can build an equally power capable controller for $100 give or take. 1x Arduino UNO or Micro, 4x TB6600 drivers and a 36V PSU.
But the Xcontroller is plug and play, so there is that ![]()
I have a few 3D printers and printing some clamps sounds like a plan. The seller is actually selling it because he needs the space. Is it possible to have it set up on a support table that can articulate some as long as everything is bolted down? I’m thinking about those tables on wheels that they use in school lunchrooms (I’m a teacher so I see them all the time). This could cause calibration headaches I suppose. I do have a dedicated workshop, a large shop vac, and a 3D printed DIY version of a dust deputy which I made for a blast cabinet but have not tried out yet.
Well, if the price is what I’m hoping I heard, there may be room for the Xcontroller and some upgraded steppers. I’m thinking I’m getting a better deal so he can come over and use it once I make all the upgrades 
Upgrading the controller is not that expensive, but is some work. I did it to my original X-Carve. You need to purchase an Arduino Uno (~$3-10), 3x stepper controllers (TB6600 about $10 each) and a 24-48V DC power supply (~$25). If you are not that confident with electronics you may want to purchase a complete controller, but that will run a couple hundred $.
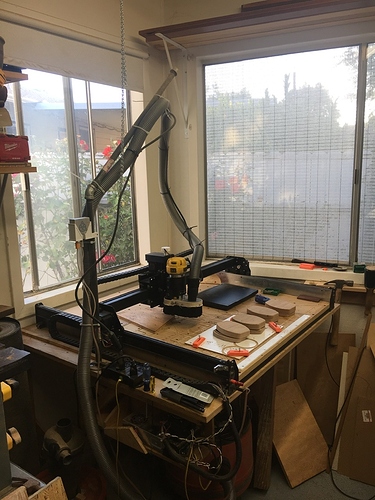
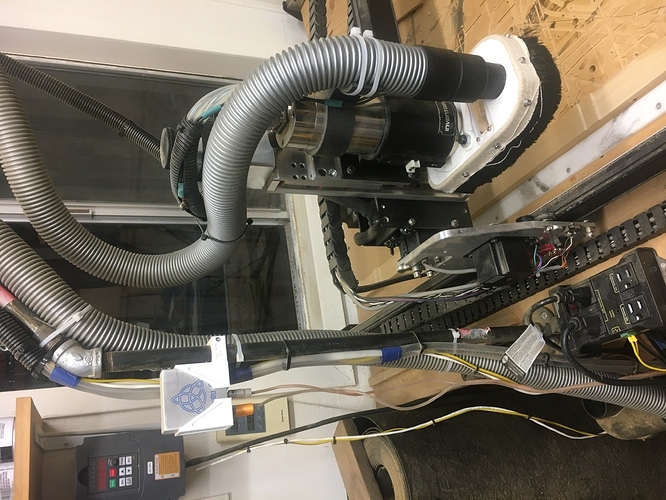
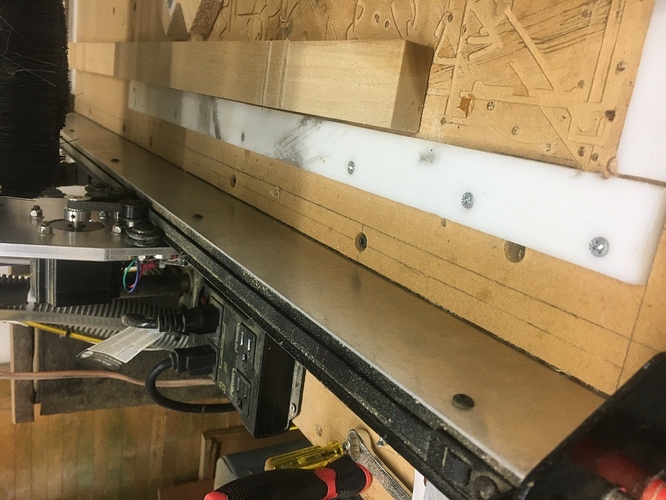
I have an older Arduino Shield controlled X-Carve 1000 that I bought used about 5 years ago. It has the beefier X-axis rail. I would get odd stoppages during a job. I redid the motor wiring using Shielded 4 conductor wiring. The shields are all tied together at one point on the Arduino metal chassis. I also have One wire from that point to the chassis of the power supply. I have two clamp on ferrite cores on my 15’ ft. long USB cable. I use a laptop connected to a different outlet, but same circuit. I use an Iot Relay Bix by DLI, $26 from Amazon. My spindle and controller are plugged into this. I splurged and got an InSinkErater STS-00 dual outlets Sink top switch, $70 from Amazon. It’s an air switch. I mounted the button along side my X-carve. On the right in my case. Now I don’t have to stoop to turn on the Vac. I haven’t had anymore odd ball stops during a run. I think I got the wire from Jameco. These mods were done in 2017 and 2019. I also replaced the Z axis and with the CNC for Newbie one along with their riser kit. I added 1/8” x 4” wide Aluminum sides to my Y-axis rails. These stiffen the rails and keep the chips sort of controlled. I also added an 800 watt water cooled spindle and controller. I gave up 1/4hp versus the Dewalt which was ok because the spindle is heavier. The spindle is also dangerously QUIET. You really have to keep an eye on its controller to make sure it is On or Off. I haven’t sprung for a new X controller. I think I would go all in an get a new lead screw drive machine at that point.
@ [EdwardJPacheco]- that setup looks great! I’m still waiting on my friend to settle the deal. He may have changed his mind! I appreciate all the great ideas here, makes me more confident in getting support.
-Sugi
is that a canvas cover to the dust shoe? I have never seen that before!
No, I 3D printed a dust shoe I designed. The canvas is part of the nylon dust brush shield I wrapped around the shoe. The shoe is held on with magnets. The brush is available via Amazon. I just looked it up and it is indeed called a dust shoe brush. $13.
I wouldn’t spend more that 40% of what a brand new machine costs. If you can get it for less than that, even better. Also, CNC4newbies.com sells some really nice upgrade kits for the CNC you’re looking at.


