I’m trying to move the material in Easel to the location as to where I have it on the table. I’m striking our on where to change the option of where the material is located and help would be appreciated. Cannot find the article and I likely suck at using the correct keyword. I know how to change the material dimensions, though cannot find the location.
Thank you!
Hey Tom,
We’ve all been there… you dont need to move the material. You just ned to tell Easel where your starting point is …
Check this out and see if it helps clarify it a bit https://m.youtube.com/watch?v=OjYoDMPd0T8
If not… happy to try a different way to show you…
This may not have answered my Q, but it taught me another trick… so, thank you!
I have the 1000mm Xcarve and I put in the size of 750x750 area and it always places the material in the bottom left, at 0,0. This may very well be by design, though when I rotate/zoom in Easel, it always uses the 37.5,37.5 axis and will spin and focus on that specific section. Anytime I try to zoom in on my work I have to look at it in a strange angle or resize my board to show the incorrect settings.
Here is a screenshot showing what I’m thinking; Screenshot by Lightshot
I appreciate your help on this, as it is a puzzler for me and I’m trying to get going on my new hobby.
Thank you!
I think I see where you are going with this…
By default, the starting point in Easel will always be bottom left, 0,0, regardless where your “material” is on the table. (unless you change the starting point as per above video)
Invest a bit of time and check out these tutorials… https://inventables.desk.com/customer/en/portal/topics/1022638-easel-tutorials/articles?b_id=9566
I’ll find you a video that @PhilJohnson did on work zero as well that should help. To help people understand WORK ZERO in easel
Also search on “bump stop” and “work zero” on the forum. The concept takes a few times to mull over in your head… but once the light bulb goes off, you will know! 
If after reading all this, you are still stuck… just reach out…
Ron
1 Like
Thanks for all the info to chew on, as this should get me well on my way. I imagine my excitement accelerated beyond my attention span, so this should keep me busy for a bit. Thank you!
0,0 in Easel is not the lower-left of your machine. It is the lower-left of your work piece. By moving your work to the red box in your picture you are telling Easel you want to carve 200mm to the right and 700mm above where you zero your machine at. (You can do it and I can think of reasons I would want to, but normally you don’t want to do that.)
When you create new projects, do you only do a canvas size the size of the material? I know there are machine settings that I put in as 750/750, which gives me the massive canvas and the material on the lower left. I guess it is better to not worry about that size unless you are doing a monster cut.
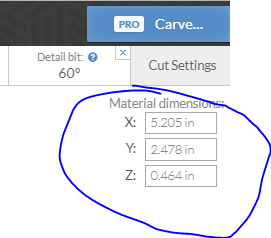
Set the workpiece dimentions in the upper-right:
Workplace and preview will change to reflect:
This is from my first double sided carve that came out near perfect today.
Check and check, though my problem (using your example) is now if I want to zoom in and look at the 3D view of the Emily piece, it will be hard to zoom in on just that lower left. I just watched the awesome vid of 0,0/home position, which taught me a lot, though I think my confusion is trying to get that material 5x2.5 centered in the 3D workspace, instead of the lower left. (If you zoom in on the right, it won’t zoom in on your material, just the center of the workspace) I’m thinking I just change my settings each and every time so that I don’t have as big a 3D workspace on the right.
Thank you for your patience and help, as my crappy question is actually piecing together a lot of things elsewhere. haha
If you are talking about the preview window on the right, right-click and drag to move the view.
Yessir, though I think you all lead me to water. Here is what I’ve found.
Resized my workspace down from 750; http://prntscr.com/hcq288
My original workspace with my true size; http://prntscr.com/hcq305
It was driving me crazy that I couldn’t zoom in on my piece no matter how I spun it in 3d view b/c of where the axis was located.
FIX: Machine settings on the top, sizing it down to just larger than the material.
I though changing my machine settings in that drop down would mess things up, though I don’t think that is the case. How I set up the carve is what truly matters with the 0,0. Please tell me if I am wrong.
How are you resizing your workspace?
Mouse wheel should allow you to zoom your preview window.
In the top left of my screenshots I was using the ‘Machine’ drop down, then changing the size to slightly larger than the piece I’d be working on. Zooming on my preview window didn’t work, as it would only zoom to the center of my set workspace, not the center of the material. I don’t know if there is a lock on the 3D preview or what, though everything I was doing was spinning on the axis at 375mm/375mm and not in the lower left where my material was located. This is why I wanted to know how to move the material to the center of the large work space.
You shouldn’t have to go through that trouble, machine setup is (usually) done once.
on the right side/preview:
Right-click drag scrolls image
Left-click drag pivots image
mouse wheel zooms image
on the left side/work area:
ctrl-mouse wheel zooms (ctrl-mouse over anything other than work area might resize webpage/interface)
mouse wheel scrolls up/down
what OS and web browser are you using?
I tried to keep the scale the same as last image.


