
I was talking to Charley doesn’t mean talking behind you  . I thought you’re not able to write on forum. Sorry.
Hey, I’d be more than happy to play with this as well, I’m always looking for more interesting stuff to work on. I need a project to test out my new DeWalt mounting and 12-degree V-carving bits anyway!
Now that would be a good bit to try to get lots of detail for his carving as well as get some depth to it. If I were him, you would be my first choice so far with a 12 degree v bit.
As for the dewalt, I just finished mine and I am lovin it! My X-Carve 1000 is a entirely different machine from what it was when I got it. EVERYAONE should be using the dewalt along with stiffening the x axis.
I don’t know that I could make it look good. I know I can’t now, I just put my dewalt on and don’t have the 1/8 collet yet. It’s ordered though. I haven’t been doing much with 1/4 inch bitts so I don’t have but a couple. Now I need to invest in more bits! Loving the Dewalt though. Compared to the stock spindle it is an all out beast! Going to add a youtube video of it this evening. That will be on a different thread though.
Sorry Russ, don’t mean to hijack your thread. If I were you I would be looking hard at DanBrown. He has a 12 degree v bit apparently and that would do a better job than my 30.
It should be rather interesting, I’d think it would be served best by a V-carve with a flat bottom depth set. Use, say, the 12-degree V-bit for the details and profile, then come back and flat-bottom it with a 1/8th spiral or something for a nice, smooth bottom to the large areas.
@CharleyThomas, I don’t see any particular reason not to try it with the 30 as well, it’s not like a chunk of MDF for testing is particularly pricey. 
Here are some 1/8th inch 10° bits:
From China, might take a while to get here.
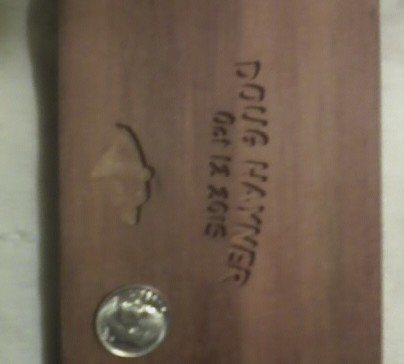
Ok the bear is 1 1/2" in witdh and 7/8" tall. The Doug Hayner image is 2 7/8" wide.
Now if the image is engraved (or carved?) dead center on work piece (a nice dk. walnut, or dk. mohogany) the wood piece would have to be 4 1/4" wide x 2 1/4" tall. Could be bigger to give me play room, but that is minimum. Again thickness would have to be 3/8".
bear.pdf (215.2 KB)
doug.pdf (234.4 KB)
1 Like
Ok, I’ll give it a shot on Friday, should have the new spindle all ready to test by then! I’ll run a test cut on some MDF, and see how it comes out.
1 Like
cool! I will diggle with this over the weekend and see what I can come up with.
should be entertaining!
Thanks guys, I appreciate your help. And if you need some shipping money and a bit for some dinner let me know.
I played with it last night, using a 1mm end mill here is what i came up with. wood is Massaranduba, a south american hardwood.
for the final piece i would cut the blank oversize and make all the images on it.
You could then cut it however you wish to suit your needs 
edit
I suppose I could have rotated the pics, short night last night with the severe storms keeping me up…
I ink it looks great. On the final cut though I will need more bare wood space between the bear image and the text and each is for different sides of course. And yes I love the dark wood best. Awesome job! Thanks
Man, that came out looking nice! Being a moron, I damaged the tip on my bit running it into one of my hold-down screws. It’ll be Monday before the new one shows up. Facedesk
I snapped my 1/32" bit when jogging my machine on a clamp a while back. not only did the end of the bit take a little trip so did whatever was in my hand at the time. I located a set of 10 1mm endmills on amazon for $8.50 which is what I used to run this test piece.
I ran a final for RussBurke this morning and once I hear from him again it’s off to where ever.
1 Like
Very nice, man! That came out looking quite good.
1 Like
A top-tip on avoiding your hold-down screws is to overlay your screw locations in your CAD package using a separate layer, ensuring you avoid hazardous areas within your design. Before you do your main cut, run the screw hole toolpath as an extremely shallow drill strategy on the material while it is lightly held with tape or something similar - you only need to scuff or mark the surface. Once you drill and fix in the marked locations you can be confident that they will be avoided by all of your subsequent toolpaths. I hope this helps…
E
Good tip, and one worth noting! In this case, it wouldn’t have helped me, though, unfortunately. It struck during a rapid move where the safety height wasn’t quite tall enough. My own damn fault, instead of ordering a .200 safety height, I ordered a .020 safety height. D’oh! Stupid decimal places.