We use cookies to personalize content, interact with our analytics companies, advertising networks and cooperatives, and demographic companies, provide social media features, and to analyze our traffic. Our social media, advertising and analytics partners may combine it with other information that you’ve provided to them or that they’ve collected from your use of their services. Learn more.
I just received a new drag chain kit which is supposedly for the 1000mm X-carve. I bought it as an additional upgrade to my machine which I could add while I was installing the new X-controller and Makerslide. But right out of the box I noticed that the new drag chains included in the kit are only about half the length of the original drag chains. So I’m wondering why and wondering if I got shipped the wrong drag chains?
I’ve looked through the instructions for the new 1000mm X-carve. But I just can’t see how these shorter drag chains are supposed to replace the longer ones I had without ripping wires loose as the gantry travels to the limits of the workspace. And I want to find out before I go to the effort of trying to install them.
So the wiring is just tie-wrapped to that new rail and the drag chain is attached to that rail in the center?
In your photo it looks like that new rail is right on top of the wasteboard dividing the workspace in half. Is that really how it is?
And the Y-axis drag chain has no additional rail. So what happens there? Your photo is pretty dark and it’s hard to see how the drag chain is attached.
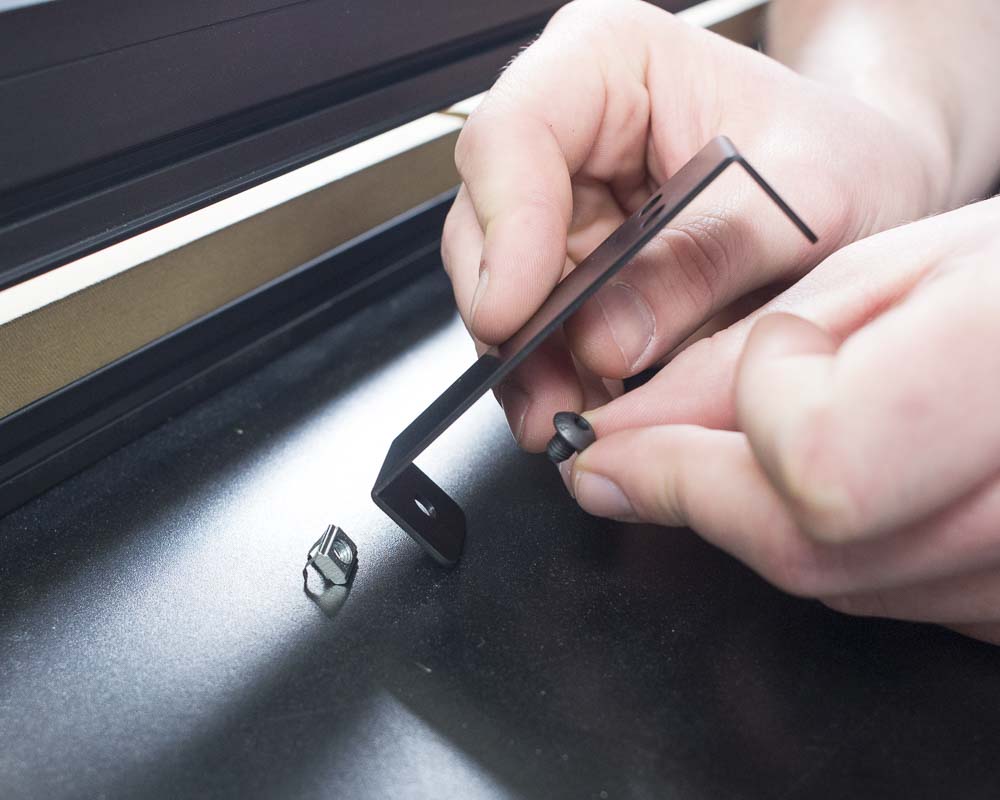
What he is trying to show you is that the new X-carve has a 20mm by 20mm extrusion (aluminum bar) running behind the x-axis that the new drag chain is supported by, you need to have this bar installed to use the shorter drag link as this bar is also what holds the wire with some little clips that are supplied with the new X-carve. it is all in the drawings on grabcad site.
Edit:
The new bar is slightly higher than the X-axis. and the new drag chain goes over not under the nema motor.
click on x-carve from the main page, then click on assembly instructions link in header to the left of the blue order now button, then click on 1000mm link with picture of x-carve, scroll down to were it says, The X-Carve is open source hardware. We have 3D models and drawings available in a GrabCAD repository here. click the link in the here. this will take you to where the files are located. you can click on xcarve2.stp under assembly to find what each part is. there are also PDF of each part located in the drawings folder.
Thanks! This gives me a much better idea how things should be. But it also raises a new question.
It appears that the new rail for the Y-axis drag chain is part of the sideboard. But I really didn’t want to install the sideboard if I could avoid it. Can the new rail for Y-axis be installed without the sideboard?
I just installed the side board so I can not say for sure but I do not see why you couldn’t but if you don’t want the side board why install the shorter drag chain? just keep the original mounted to the corner as I don’t see what advantage you would have with the new design as then you would have all that extrusion sticking out with nothing there but the chain.
Edit:
Plus the side board gives you a nice place to hold your controller and other stuff.
The advantage to the new drag chain is that it is hinged and opens for wiring. Besides, I’ve already removed the old drag chain and I have the X-controller assembled and the Makerslide installed. So the drag chain kit is next.And I have a nice bench which I’ve been using with my X-carve for the past year and the sideboard sits where I now have the computer that I use to interface with the X-carve.
You know, I’m beginning to think that I wasted my money buying the new drag chain kit. From what I can see, there is no way to attach the drag chain end to the left Y plate or the gantry. It seems that both plates of my X-carve are missing the two holes that the brackets that hold the end of the drag chains are attached.
Apparently X-carve V2 must have different plates; which don’t even seem to be available in the Inventables store.
Any thoughts on how to work around this would be appreciated.
If all you want is the hinged chain the you can order all you want from Inventables at https://www.inventables.com/technologies/drag-chain choose the type of chain you want to use and order it in 1 meter sections. as far as the 20mm by 20mm extrusion goes same there, I ordered one for the 1000 mm machine and made some brackets out of acrylic from the grabcad dimensions, this keeps my drag chain from drooping down below the X-axis makerslide. this thing is open sourced and it is the only reason I choose it. You can make it whatever, however you like it to be.
After talking with Inventables staff, it turns out the drags chains are precisely the right length for the X-carve V2 design But, as such, not quite right for my X-carve without certain changes.
The sideboard upgrade to the machine has a rail to which one end of the new Y-axis drag chain attaches. And there is also a new rail on the back of the X-axis Makerslide to which one end of the X-axis drag chain attaches.
The other ends of both drag chains attach, respectively, to the left Y-axis plate and to the plate on the back of the X-carriage. The only problem with that is that both of those plates are now different than the plates that came with my X-carve. Each of them has two holes for attaching the drag chain brackets that the original plates do not.
Thankfully, Inventables has the best customer support and, after discussing the problem with them, they offered to send me both new plates.
It should also be noted that the plates for sale via the Inventables store still display the images of the plates for the X-carve V1. But I imagine those will be updated soon.
It is also worth noting @KennethConnell1, that the hinged drag chains for X-carve V2 cannot yet be found on the Inventables store. The new drag chains are 18mm x 25mm with 21 links and are only available at this time as part of a $65 drag chain kit that includes new drag chain brackets and related hardware. And which, I suspect, will probably soon include the new plates I mentioned above if Inventables doesn’t find some other way to attach the new drag chains via some means which spares V1 owners from having to almost completely tear down their machines to uprgade to the new (and I think much improved) drag chains.
A couple of months ago I upgraded my 2015 X-Carve to the new drag chain setup like you’re doing, and while I found a few surprises I think it’s a big improvement. At the same time I also upgraded my wiring to include the Z probe as well as the independent connection for the right Y motor to the X-Controller (was still shared before). The switch to eccentric spacers from eccentric nuts was also part of the upgrade as was the X axis switch to wide Makerslide. I think the only things I didn’t even up taking completely apart were the base frame and the right Y axis.
When I ordered the upgrade I ordered the full drag chain kit so I had all the brackets, 20mm extrusion and such. I already had the new X carriage, but like you noticed that the left end plate needed a couple of holes. Fortunately these were easy to drill.
The 2016 X-Carve uses plug in connectors instead of those terminal strips for the steppers. I noticed that the new drag chain assembly left VERY little clearance for the wires for the X axis stepper, in fact I had to rotate the stepper motor 90 degrees to make things work and then the motor wires were just barely long enough to still reach.
There may have been other things I ran into, just not coming to mind at the moment.
I have also upgraded my 2016 (old model X-Carve) with the upgrade kit. I also ordered the 20mm by 20mm extrusion and I also had to make the brackets for the drag chain and drill some holes. What I was trying to explain was that there are files for this new design on the site and that by using them you can upgrade your machine. I was under the impression that people that have this machine was into making things and I thought that as such it would not be a problem fabricating small parts to complete the upgrade (did not take that long to make brackets etc.) I did not understand that you just wanted to purchase everything new and have them shipped. I thought you had an older machine and wanted to install the upgrades with what was available. I am glad that you have figured out that you can wait and someday they will make all the parts for you and then you can just install. Sorry to have misleaded you.
@KennethConnell1: As things stand, by the end of the week I will have all the parts I need to complete these upgrades and the parts will all have come from Inventables. It’s great that you could make brackets and such on your own but many of us don’t have the option of making such parts. I work with wood, ceramics, plastics, glass, and electronics but I have no experience with, or tools for, making metal parts. My focus is on making the various things I already make and the X-carve, to me, is simply a tool to help me do that faster and better.