Hey, everyone!
I wanted to share a project I started working on last night. I’ve never shared one of my own projects here, but it seems like it’s a good way to get some feedback.
The first thing you should know about me is that I had zero experience (possibly less than zero, if possible) doing any kind of woodworking, constructions, tinkering, etc. when I joined Inventables just over a year ago. I hadn’t even seen a CNC machine before until I was asked to build an X-Carve 2015 during my first week.  Needless to say, the learning curve has been steep—and very rewarding!
As such, it’s only fair to warn you that I’m a pretty reckless carver. I don’t do things the way they should be done and tend to jump head-first into projects with very little planning. I’m all execution with no foresight. I’m so curious about learning that I tend to let some details (ok, most details) slide as I explore. Most of the things I start and intend to have as finished pieces end up being learning experiences and prototypes for more finished pieces later on…only I sometimes don’t get around to making the “finished” pieces and just deal with the sub-par things I make instead. Ha!
That leads me to the project I started last night: “floating” bedside tables. I say “floating” because I am still going to mount them with brackets, mostly because the kind of work I’d need to do to make them truly float is beyond my scope of possibility right now. It’s also beyond my time frame: my husband is out of town for a few days and I want to surprise him with some new bedside tables when he gets back tomorrow!
We’ve been using the same junked-up bedside tables for the last 6+ years. My husband had them in college and they should’ve been tossed when he graduated, but somehow, they’ve survived the 7 moves we’ve had since I met him. It’s time to say goodbye.
Our current apartment is really small, so I knew right away I wanted to make some sort of wall-mounted bedside table. There was no shortage of inspiration online, and finally, I drew up a design I liked. It has three shelves of different sizes for different things we keep near the bed (alarm clock, lamp, magazines, books, my jewelry, etc.). On a whim, I added some inset magnets at the top so we can hang up things to keep us inspired. I have a photo of my husband and I in a frame on the current bedside table, but it’s shoved in the back and buried underneath books. Now, I can use some magnets to hang it up and see it!
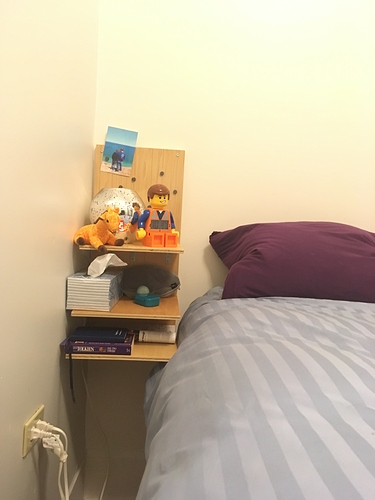
I spent about four hours on two tables last night, and here is what they look like now:
I lasered a simple line design at the top, near the magnets, just to add a little flair. The holes for the magnets were waaaaay too tight for the magnets. Even with some careful whacks with a rubber mallet (HA!), some of them are permanently crooked. I was pretty peeved about this, but I figure they’ll be covered up with something interesting soon so I’m not going to let it bug me for now. In the future, I’ll be more generous with my tolerances.
Here’s a short gif of the magnets in action: one is inset into the wood, the other will be on top of the thing being held up. These are the most crooked ones, too, and it doesn’t look too bad from this angle (right??!):

The part I am most frustrated about is the shelves themselves. Despite carving the slots twice and thinking I was being too generous with the spacing, some of those dang shelves did NOT want to go in the slots. I sanded the thickness down, whacked like a crazy person with a mallet, and did a fair amount of head-scratching. There’s a pretty considerable gap on some of the edges.
I definitely learned my lesson and plan on being more generous with the thickness of these slots if I decide to make these again. I plan on using some reinforcing brackets anyway, so I’m not heartbroken. And honestly, I’m willing to tolerate it to see if this kind of a design is ideal for our bedroom or if I need to make any changes. It’s also on the side of the design, so only my husband and I will see the mistakes because our room is so tiny! 
The plan tonight is to add the brackets for some support, paint and stain them, and have them hanging up before my husband gets home tomorrow. Fingers crossed! I’ll post an update tomorrow.
If anyone has any other suggestions for how to make a better joint for this kind of shelving unit, I’m all ears. I found a lot of resources online but I had no idea what was useful for my application or if I could obtain the right cut on a CNC.
Oh, and as a side note…I made this entire design in Easel! I cut the shelves with a table saw and lasered the design at the top to save time, but it was designed in Easel and I used the X-Carve to mill the shelve slots.
Whew! That was a long post. Thanks for bearing with me and my verbose explanation of a pretty messy project!


 )!
)!