Very nice…thank you. Some day I’ll learn this stuff.
Thank you for your help on this
Haldor,
What did you have the Trace Bitmap options set to in InkScape ? I used the standard settings and you can see what I got when I traced the image.
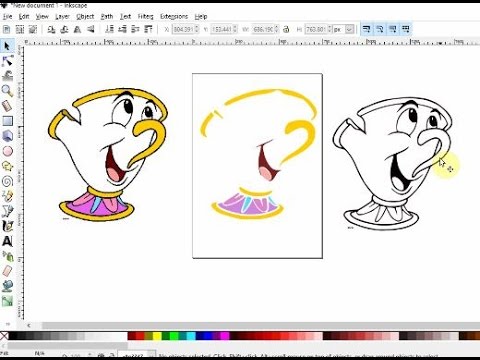
Just got back and see all this. @RussellCrawford when you convert an image that has multiple colors such as this and you only want a solid color choose the colors options under the second choice of multiple scans, then in the scans dialogue set the number to whatever has the clearest image (I always have live preview checked).
then when you create your image select your new image and click on ungroup under the menu option oblect. then you can select each layer (which is one color) and space them apart and choose which one has the best image trace. (sometimes it is a light gray one or some other color that you did not even expect) delete all the layers that you do not want and work with the cleanest layer to refine to your taste.
here is a youtube video that shows the steps
Russel, I select “Colour”, uncheck “Stack scans” and limit “Scans” to the numbers of colur I want + 1. Since this is a black/white scan I set “Scan=2”.
I then delete the original artwork and delete the background layer.
Save as SVG
(Brief reply, heading home from work)
@DeanWhitaker @RussellCrawford
I was actually just showing a student how to do something similar, so I used this image and recorded it. I think he asked me something and I paused for a few seconds.
When an image is just something on a white background, you can crank up the threshold since we’re not trying to catch the pixelation.
Obviously, there are a few ways to get this to work.
So I took a look at your original file. Your biggest problem is that your client gave it to you with what looks like a scan of a printout, and the ink/toner didn’t do a good job covering. So the way I solved it was to bring this into photoshop (or GIMP - free if you don’t have AI) and then selected the white background area with the magic wand tool (don’t do a color select or you get all the bleed through points where the paper is showing inside the hearts). So now you have the opposite of what you want. You can invert the selection (command-shift-I) now you have the hearts. So now you can fill with the correct color (as below) - and never use JPEG for this as you get compression artifacts, PNG is a way better way to do this. Anyway you can do something different if you have AI (maybe GIMP/Inkscape can do this too?) with your selection instead of filling it in, you can convert your selection to paths, and then "export paths to illustrator). This takes the nice paths out of photoshop’s selection and turns them into vector artwork in AI.
Here is your original file “fixed” which will likely trace perfectly for you.
and finally the SVG to import into easel/vcarve/whaetver:
heart border.svg.zip (5.4 KB)
I will also add that programs like Illustrator can actually generate a pattern like this (this is all one heart randomly rotated/scaled/swept along a path [rectangle]. So I am betting if you made this pattern using the Patterns generator in Illustrator you would get a very similar result that the client would like (unless they are passionate about that specific set of hearts). I did a similar pattern with paw-prints for my wife’s animal hospital’s cat play-gym. To supply grip to the surfaces (the cats kept sliding off the steps) I engraved a paw-print pattern not unlike this one, as little notches their claws could catch on…
Back to this…AGAIN…So life shouldn’t be so hard for an old simple minded guy that just wants to make some neat stuff on his CNC router.
I’ve watched Youtube videos, read online tutorials, and read info thus far on this thread and am still completely confused. I don’t understand stacks, scans, layers, or anything else remotely close these “technical” terms.
All I want is the absolute easiest way to take a simple image found on a Google search and convert it to something that I can work with. I have Inkscape but am not opposed to anything else that makes design EASY, SIMPLE, DUMB GUY TERMS.
Honestly I want to know the steps…don’t care why right now, just want to NOT spend 3 hours on something that should take 20 minutes to design. Here’s my latest “project”…https://www.google.com/imgres?imgurl=https://www.pngjoy.com/pngm/12/359290_tree-vector-pine-tree-silhouette-png-download.png&imgrefurl=https://www.pngjoy.com/preview/s7n6o1v5e3i1r6_tree-vector-pine-tree-silhouette-png-download/&tbnid=du7lS4zt-i3kZM&vet=1&docid=Z70vpaBbVuq_qM&w=880&h=758&hl=en&source=sh/x/im
All I really want is the outline of the trees…shouldn’t be THAT hard I wouldn’t think.
Anyway…suggestions for the absolute easiest software to use to do this type of work OR just a simple tutorial would be awesome. I don’t want to waste everyone’s time and maybe I should’;ve posted this on a different thread but you all have been helpful so I thought I’d poll here.
HELP!
Download image.
Open in Inkscape.
Select image.
Right-click --> Trace Bitmap (default settings will work), click OK.
Move trace to the side.
Delete original image.
Save as (give the file a name)
Import into Easel.
You can (crudely) trace image directly in Easel, using Image Trace app. This is the absolute simplest method, but it has limitations and depend heavily on an appropriate source image for clean trace.
Your Pine-tree image is a clean B/W image well suited for tracing.
For greater control of output, Inkscape is really good and using only a few of its elements goes a long way, but the initial learning curve may appear steep.
Here is a video showing the steps, plus more on how to manipulate the nodes - skip that for now and focus on how to convert, save as SVG and import into Easel first ![]()


