
Okay. So I started off with a Shapeoko 1, then a Shapeoko 2. Then I gradually got more and more comfortable making CNC machines as I modded my Shapeoko 2. Here are a few pictures of the results:


Okay. So I started off with a Shapeoko 1, then a Shapeoko 2. Then I gradually got more and more comfortable making CNC machines as I modded my Shapeoko 2. Here are a few pictures of the results:
Only a couple projects unfortunately since I have been working on my personal build.
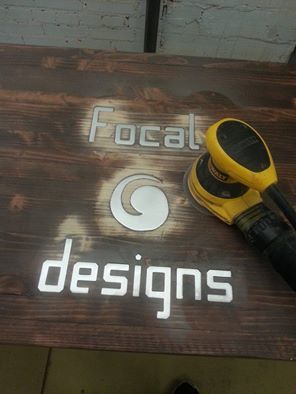
I made it for a Makerspace. I did the TV sign in the background as well as flattened out the table.
Then an aluminum inlay:
Also a 3d Wall Panel:
@AugustineSolis do you move the Z-axis up manually on the large system and then use steppers to drive the smaller motion of the actual program or is it all motor driven? Also, what is the overall size of that thing??..it looks huge!
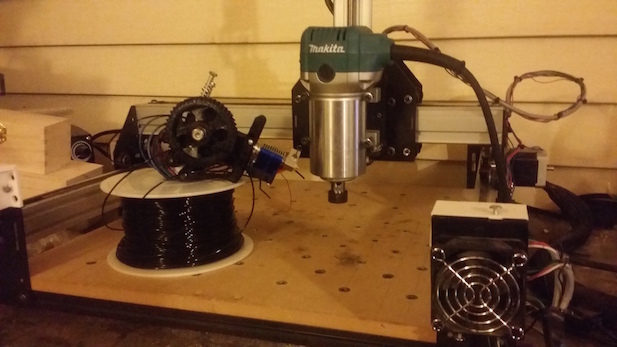
It is driven by stepper motors all around. For the Z axis there are two steppers up top that drive an acme screw with a 3:1 gear for more speed. Its like the Xcarve Z axis just a little beefier- on two sides.
There are 5 steppers for movement - 2 for Z axis, 2 for Y, 1 for X. Two are used for extruders for 3d printer attachment.
All motor drivers, power supplies, control board, VFD and water cooling are mounted up top.
It is 1200mm x 4000mm x 1200mm. It was designed to CNC cut full plywood sheets and print small children.
That tall one is on the cusp of insane! You could set a stack of plywood in there and do aq production run by lowering the Z major as the sheets are removed.
BTW, making children the old fashioned way is more fun than printing them.
Perhaps, but THIS machine CAN go all night long.
I saw someone do production run like that once. I would think if you are cutting all the way through it would damage the piece underneath.
On a side note I carved two tables and one barstool.
Both tables weighed enough to just set them there. The barstool was mounted very oddly.
Its nice to have height on your side. I never did get to try a tree trunk.
if the same pattern is being cut repeatedly would it matter if the underlying piece became slightly damaged from the on being cut above? As long as the next piece is not shifted at all as the finished one is removed there should be no issue. Actually, the previous piece should help reduce tearout on the surface of the one below.
I freakin love the idea of being able to stick a full piece of furniture in the cnc machine
is that machine ridgid enough to get a good finish?
Depends on the chip load and how high up you are. The higher up it goes it acts more like a lever. I surfaced the table above taking off about 1/4 inch in one pass with acceptable results. Then carved out the inlay.
It was never meant to be used at that height for CNC routing only 3d printing but it performed pretty well I think for a stress test.
Totally off topic, but are you at the Binary Space in Bryan/College Station?
Until they recently closed down the space yes. Not enough makers in the town also apparently insurance is very high. Still in the area working on my own machines.
Sorry to hear they closed, but glad you are undeterred.
Was out working on the garage build again. I got the 4th axis on today.
Also had to do some wire management since I welded the computer side on the wrong side.
I didn’t have any 80mm x20mm extrusion so I just printed up some joining hardware.
All clamped up and ready for drilling and bolts.
And we’ll skip to the good part.
Ended the night with cleaning out some space for the electronics.
Thought I would update the thread with the latest in my garage CNC adventure.
First I surfaced the bed with a 1/4" bit in order to get the aluminum bed down for temporary clamping.
I plan to have several clamping methods including dogholes, threaded inserts and t-track.
I did a few projects with the temporary bed.
Then I surfaced the remaining bed with a 1 inch surfacing bit, which was tons faster and cleaner.
Then I started milling 20mm dogholes across the bed but my belts kept slipping off the bearings across long distances. It messed up a few holes
So I had to mill some washers from some aluminum to keep the belts in place.
Then I continued with the dogholes.
Then I proceeded to make some clamps for the CNC from this video. https://www.youtube.com/watch?v=O-rqf4uSXRE
However I couldn’t get them to work too well. So I went back to the aluminum bed for some projects.
Also experimented with fingermaker to use in some upcoming joinery.
I had a 3d printed dust shoe working for a minute but the router shredded the inside of it because I forgot to to tighten it. Have to print another.
Here is the inside of my control box. I want to add an arduino with a digital switch to switch the step and direction lines of the XYZ axis’ between the arduino and beaglebone. That way I can use Easel and Machinekit/Redeem. I like that Easel is very easy to use, it’s apps, and the ability to share projects. Still researching digital switches that can switch multiple lines.
The board is a Replicape RevA which supports Machinekit allowing me to use the 4th axis. It will also allow me to research and build a 5axis head. It is originally a 3d printing board running Redeem which allows me to 3d print easily.


