
Threw this together with a pal after my X-carve arrived sooner than i thought. Didn’t finish till 2am but was worth it starting fresh with the X-carve assembly the day after!
1 Like
As luck has it, my table saw out feed table/assembly table is 40"x48"… I am thinking about building a torsion box for the x-carve and mounting the whole thing underneath the table on some heavy duty drawer slides so I can slide it out to load. As I dont have my x-carve (1000mm) yet and have never used one, is this a terrible idea? I am a bit concerned with movement…
No, movement is not gonna affect your machine. I did same thing, I put two gigantic drawers on back and front. Constantly need something, closer is the better.
This is a great deal for this slide, I figured a 40" would be about right. These also have a lock in and lock out feature and we use them for making pullout toolboxes for trucks and vans. Sorry for the long link.
SMK
Thanks for the link. I’ll give it a couple days before I pull the trigger on $200 with of slides. I would hate to buy them and someone says it won’t work! Lol
@Travelphotog and EricDobroveanu I really like the work you both have done! I plan on a lot of wood work but ultimately I’m going to be cutting aluminum and will be following you both closely to learn. Nice work!
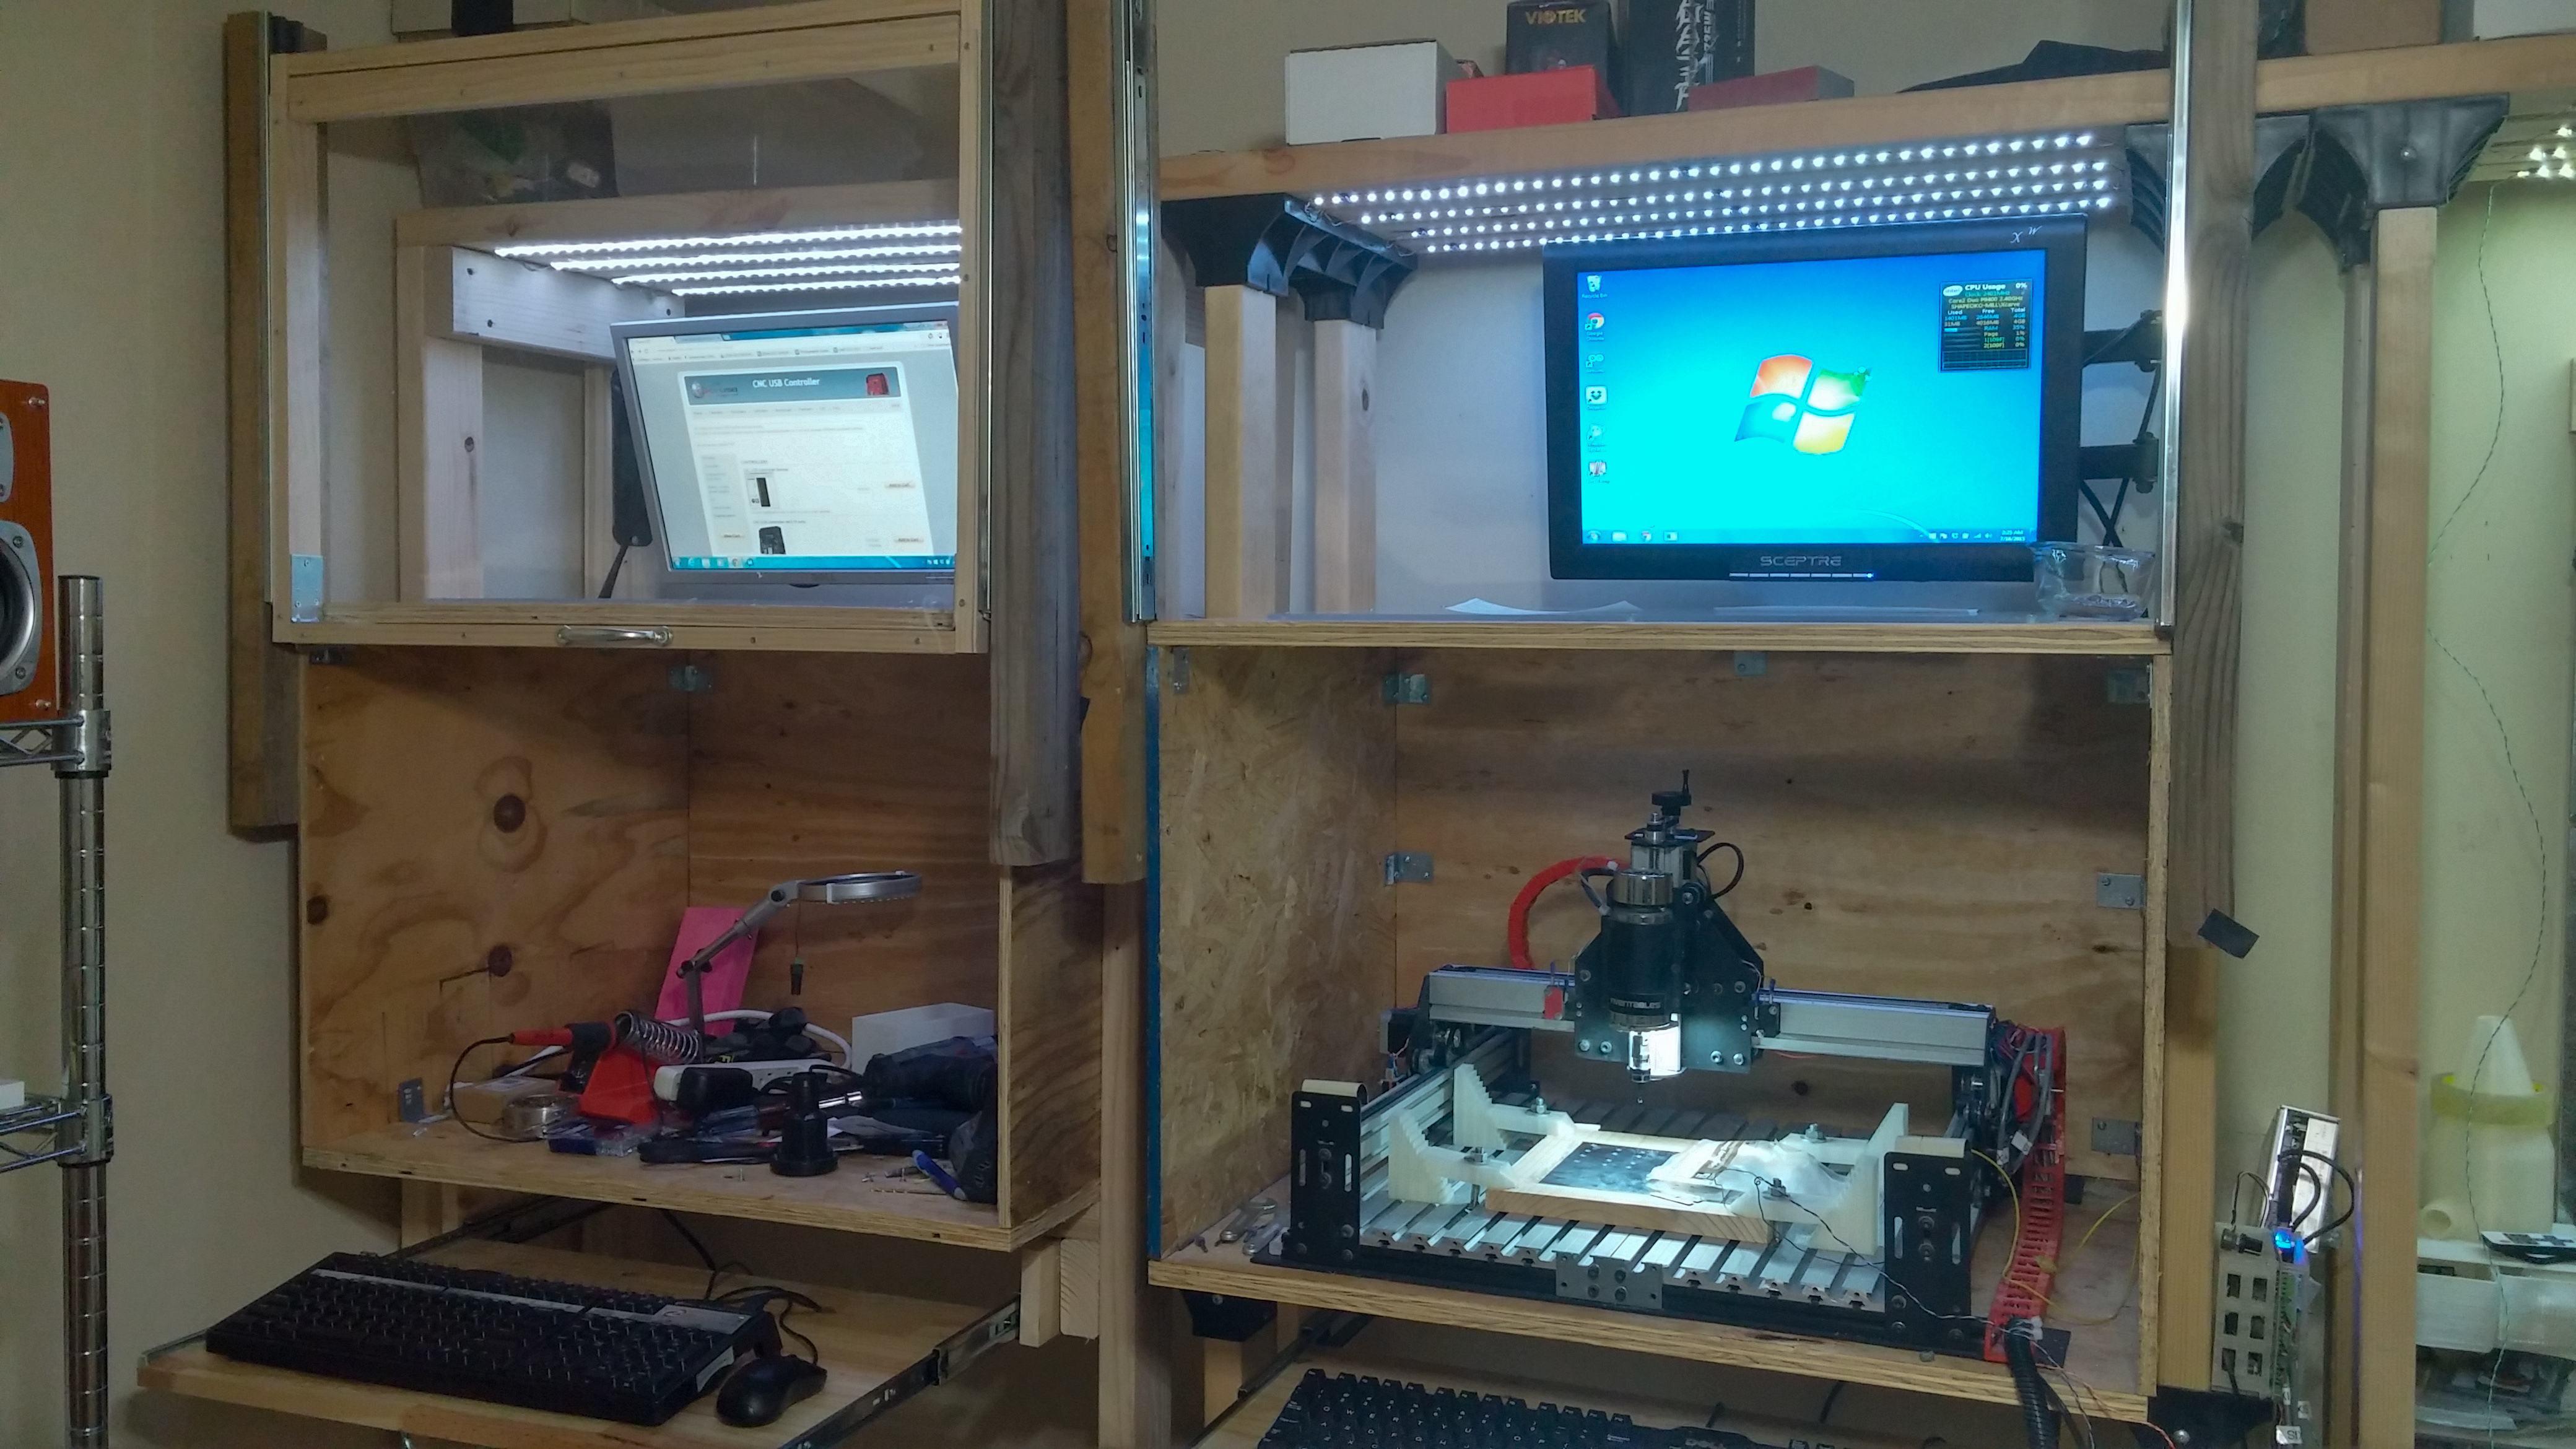
Before I left town last week I was able to install the vertical door on the X Carve side of my setup. This is the door closed.
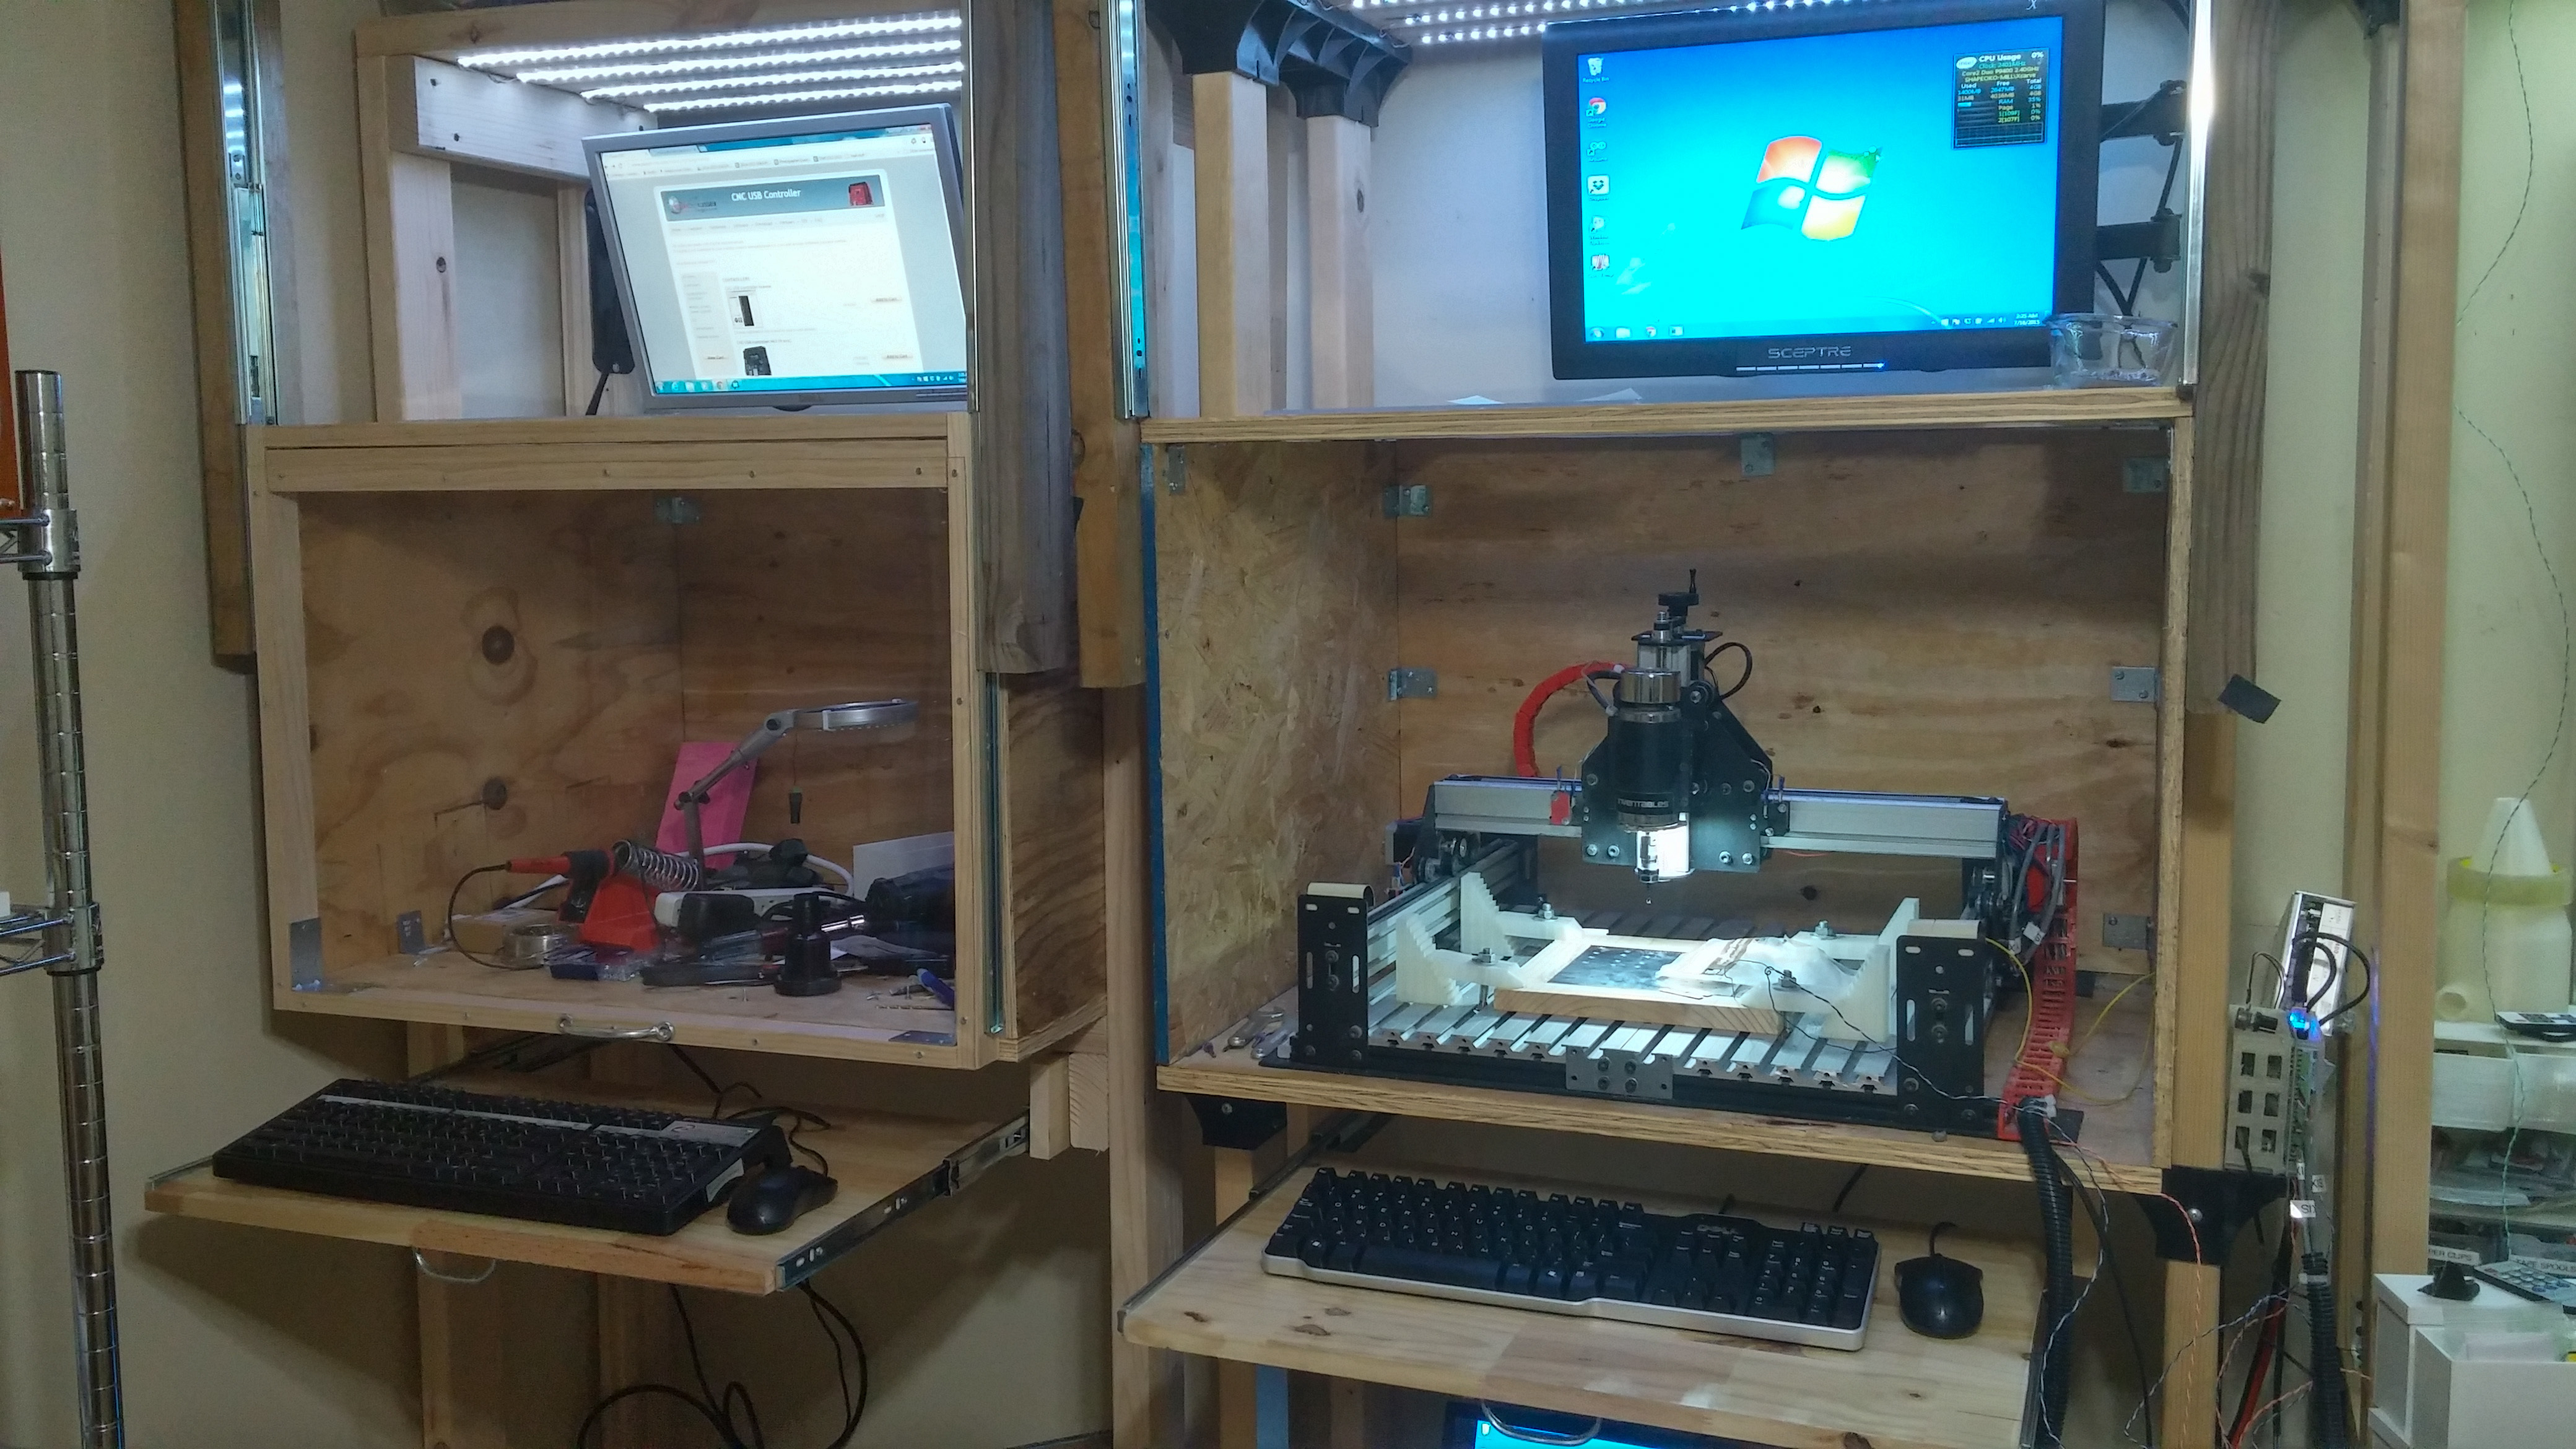
And this is the door opened. The door stays raised just fine but there is also a safety lock to keep it raised when i have to stick my neck in there from time to time for some odd reason. The top of each enclosure is also topped with a large 1/4" window to both allow in more light (more LEDs will be added inside shortly) and to allow the monitor to be seen by the 5’ 2" wife. Being 6’ 5" the monitor is up pretty high so some consideration had to be made for her.
I have finished up my travel season for the year and now have 3 moths of vacation at home to mill as often and long as I want. This week i am working in CAD to prepare the pass through plate for each mill. I am attaching everything with GX16 connectors and a GX20 on the VFD cable to the .8KW spindle. I am also planning going to convert to the smaller water cooling tubing at the pass through plate to allow the coolant into the enclosure. Inside will me the smaller tubing needed for the spindle while outside will be standard 3/8" tubing for the pump and radiator system. All connections will be breakable inside the enclosures also so the mills can be removed if needed for maintenance or upgrades without issue. Tonight I am designing the custom cable chain for the spindle coolant tubes and power cable. I will post pics of the cable chain in the AM when after I 3D print them tonight. The idea is to pass the coolant tubing through a protected passage within the cable chain and then have the power cable above that within the cable chain to stop the power cable from kinking the coolant tubes shut. Should have something off the 3D printer by the AM to test the idea with.
I am converting the Shapeoko to a PlanetCNC controller with DSP Leadshine drivers this week and moving the TinyG over to the X Carve since the X Controller is yet to be released for testing and such. This should get the X Carve up and running sooner. Just need my custom cable chain made and cable chain mounts and I am all set to get the X Carve up and running.
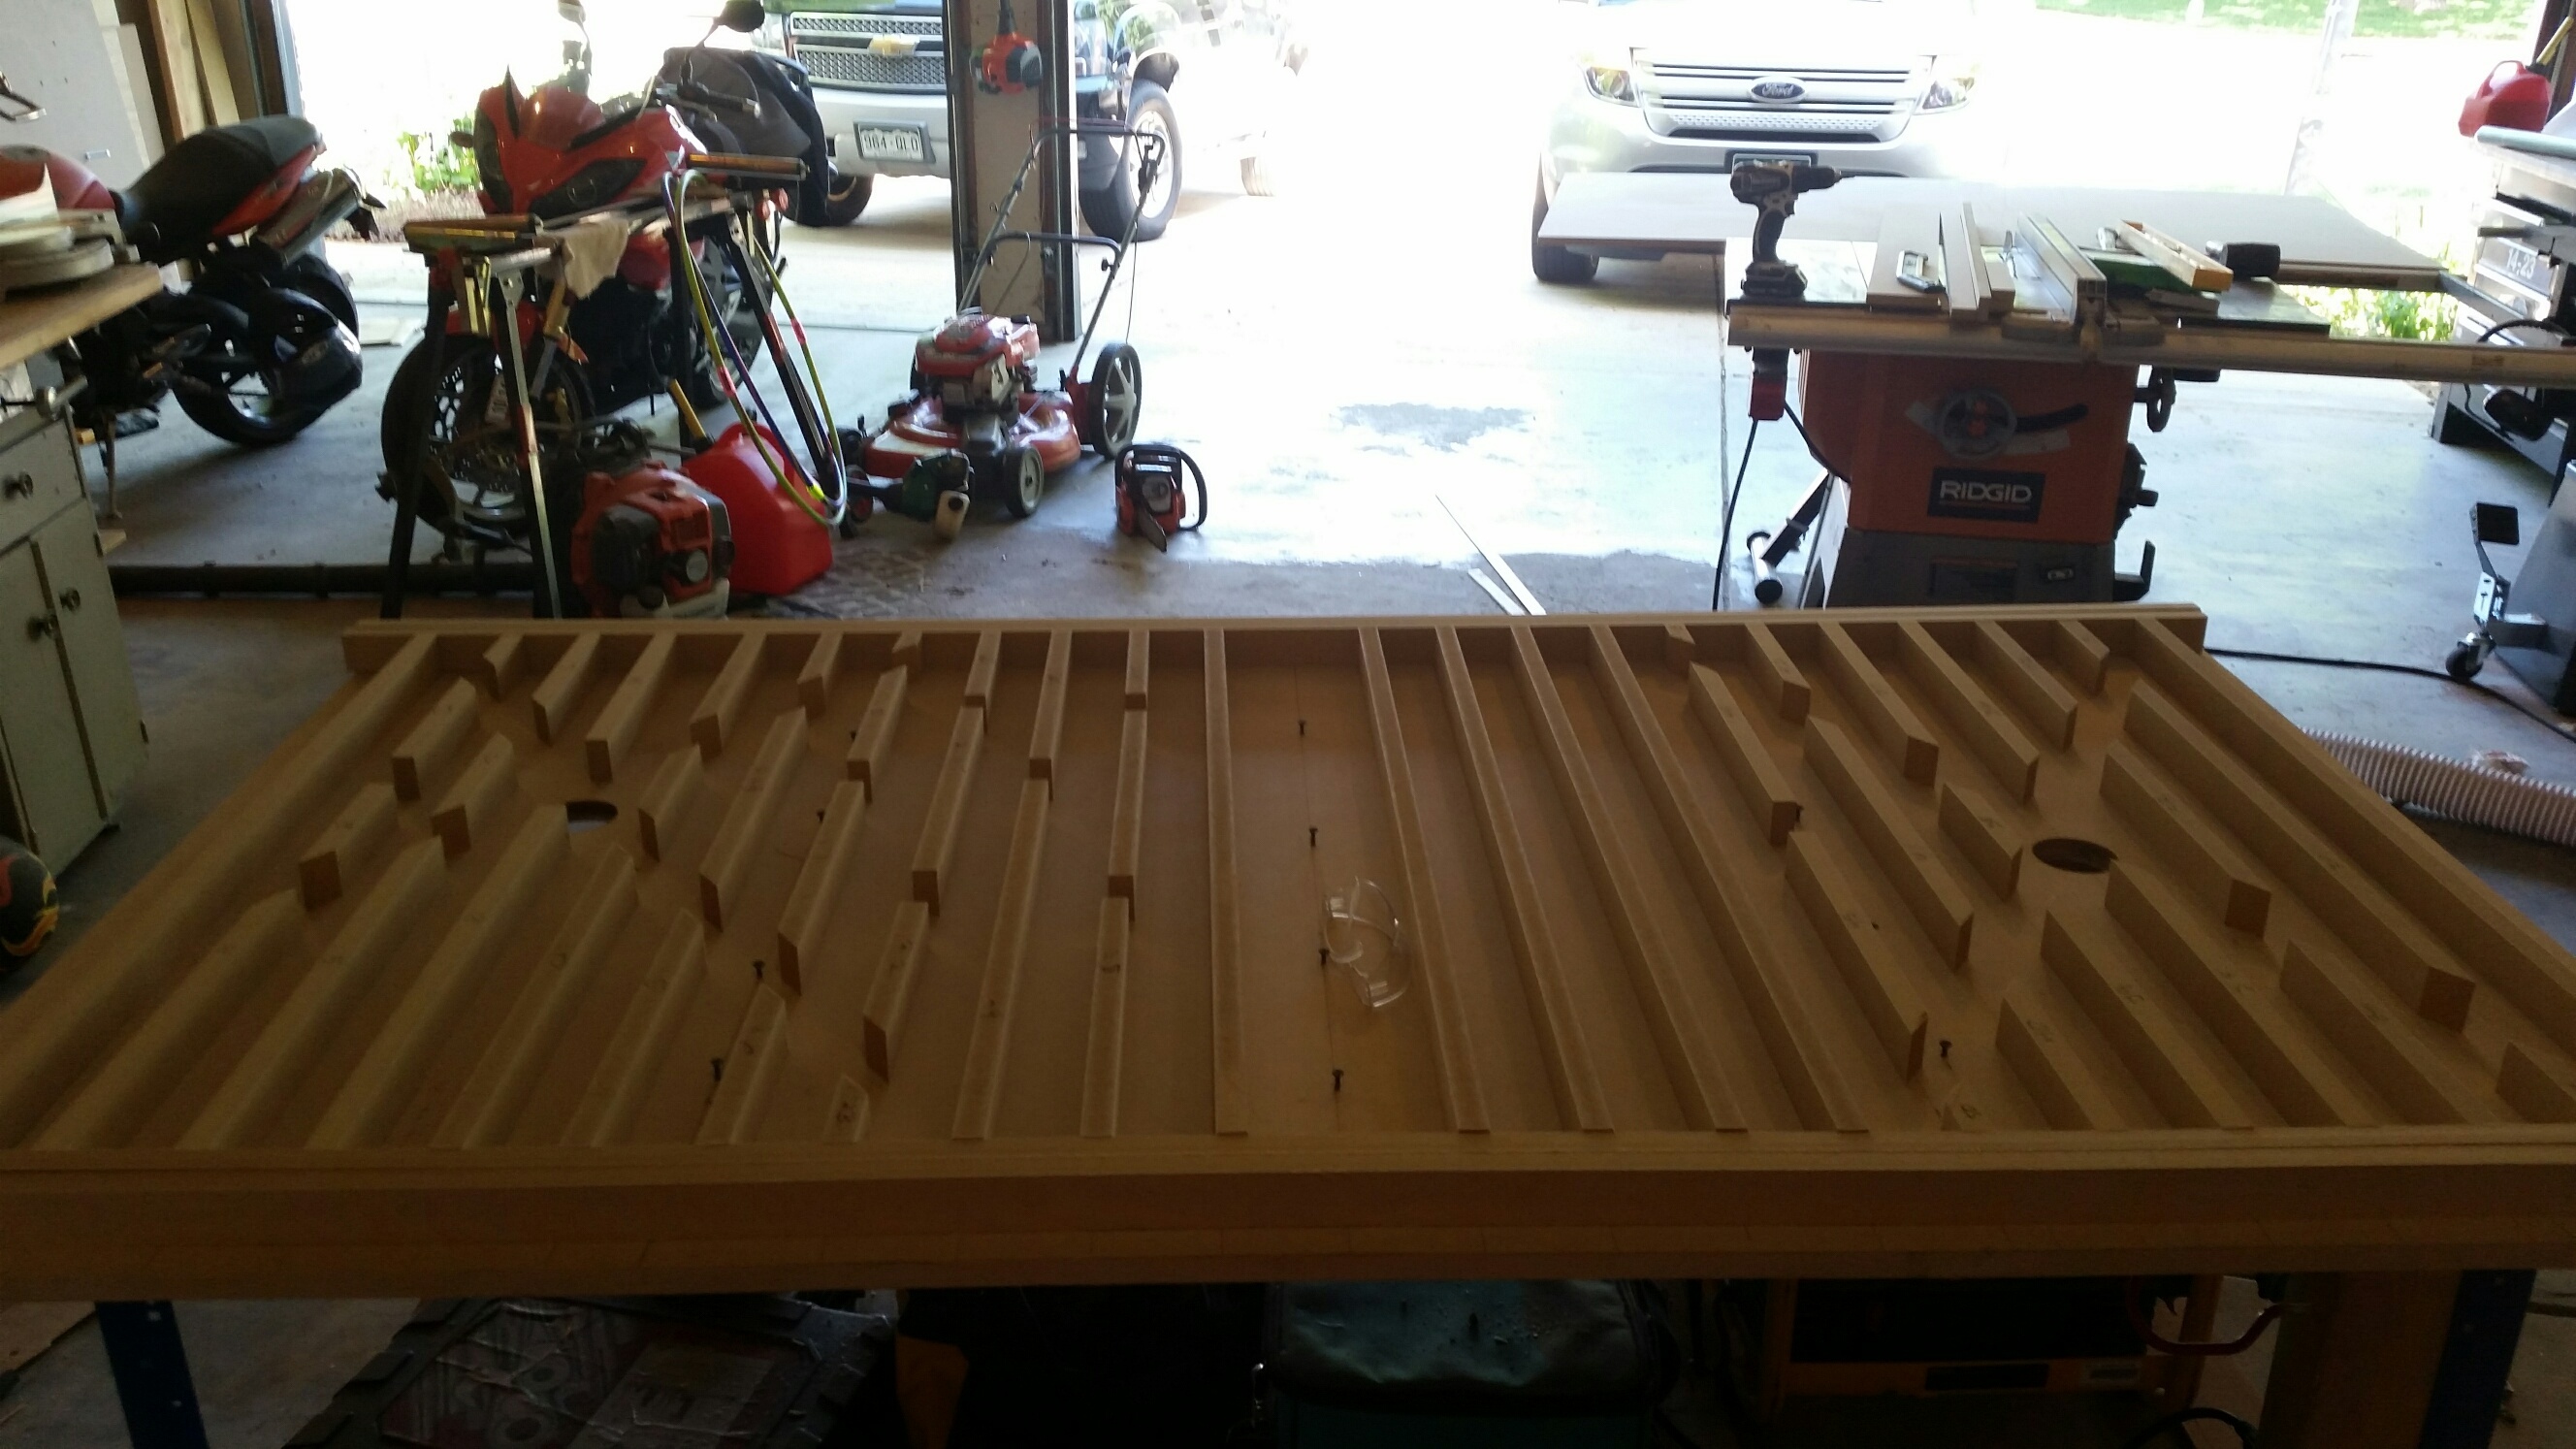
Built my 2-chamber vacuum table this weekend. It’s on top of a Kreg table frame and it’ll run off of a standard 2.5" shop vac (will use the 4" dust extractor to power a hood, at some point).
The left chamber is for the X-Carve and the right will be general use - probably mostly for downdraft sanding. Will drill the holes (at least on the left side) with the X-Carve.
I took more pictures and can send more detail if anyone is interested.
Sorry for the poor lighting in the picture…
3 Likes
Looking good. I’m definitely interested in seeing what people do with vacuum tables. I am going to put one together soon myself. I think a flow-through design would work best for me, but don’t know that I would be able to get the suction necessary with a shop-vac. That being said, what are you (or others) doing for the top of the vacuum table? You mentioned drilling holes. What size holes and what spacing are you planning? I’ve seen others using the grid with gasket design. I’m undecided on how to move forward.
Matt,
In re the horsepower concern, my idea started with THIS VIDEO
He’s using a very small shop vac. I plan to use a standard (5-gallon, maybe??) shop vac. If that proves insufficient, I’ll cut a bigger port in the bottom and throw the dust collector at it. All materials in my design are 3/4" MDF. The top (not pictured) is already sitting on top of the ribs now. I will probably affix it with screws until I decide that it’s losing too much vacuum, at which point I’ll have to glue it down. As for holes, I plan to start with few, smallish holes until (again) I figure that’s not working. At that point, I may try larger holes or more of them (or both). I have no clue how many, the spacing, etc., but I’m trying to keep with the thinking that it’s easier to drill more new holes than it is to plug existing ones, when looking to adjust vacuum pressure.
1 Like
This is what I like about these boards so much. Great video.
SMK
On our Multicam CNC we use MDF, and simply skim cut both sides before using it with no holes and a vacuum pulling THROUGH the MDF. Shop vacs won’t be as strong as the industrial vacuum used, but my point is that vacuum can pull right through MDF with no holes.
2 Likes
I guess this is my question. With the flow-through design, the shop-vac obviously won’t be as strong, but will it be strong enough? Have you (or has anyone else here) tried? Seems to be the simplest design.
wow that’s really cool. maybe I will use the dust collector, then!
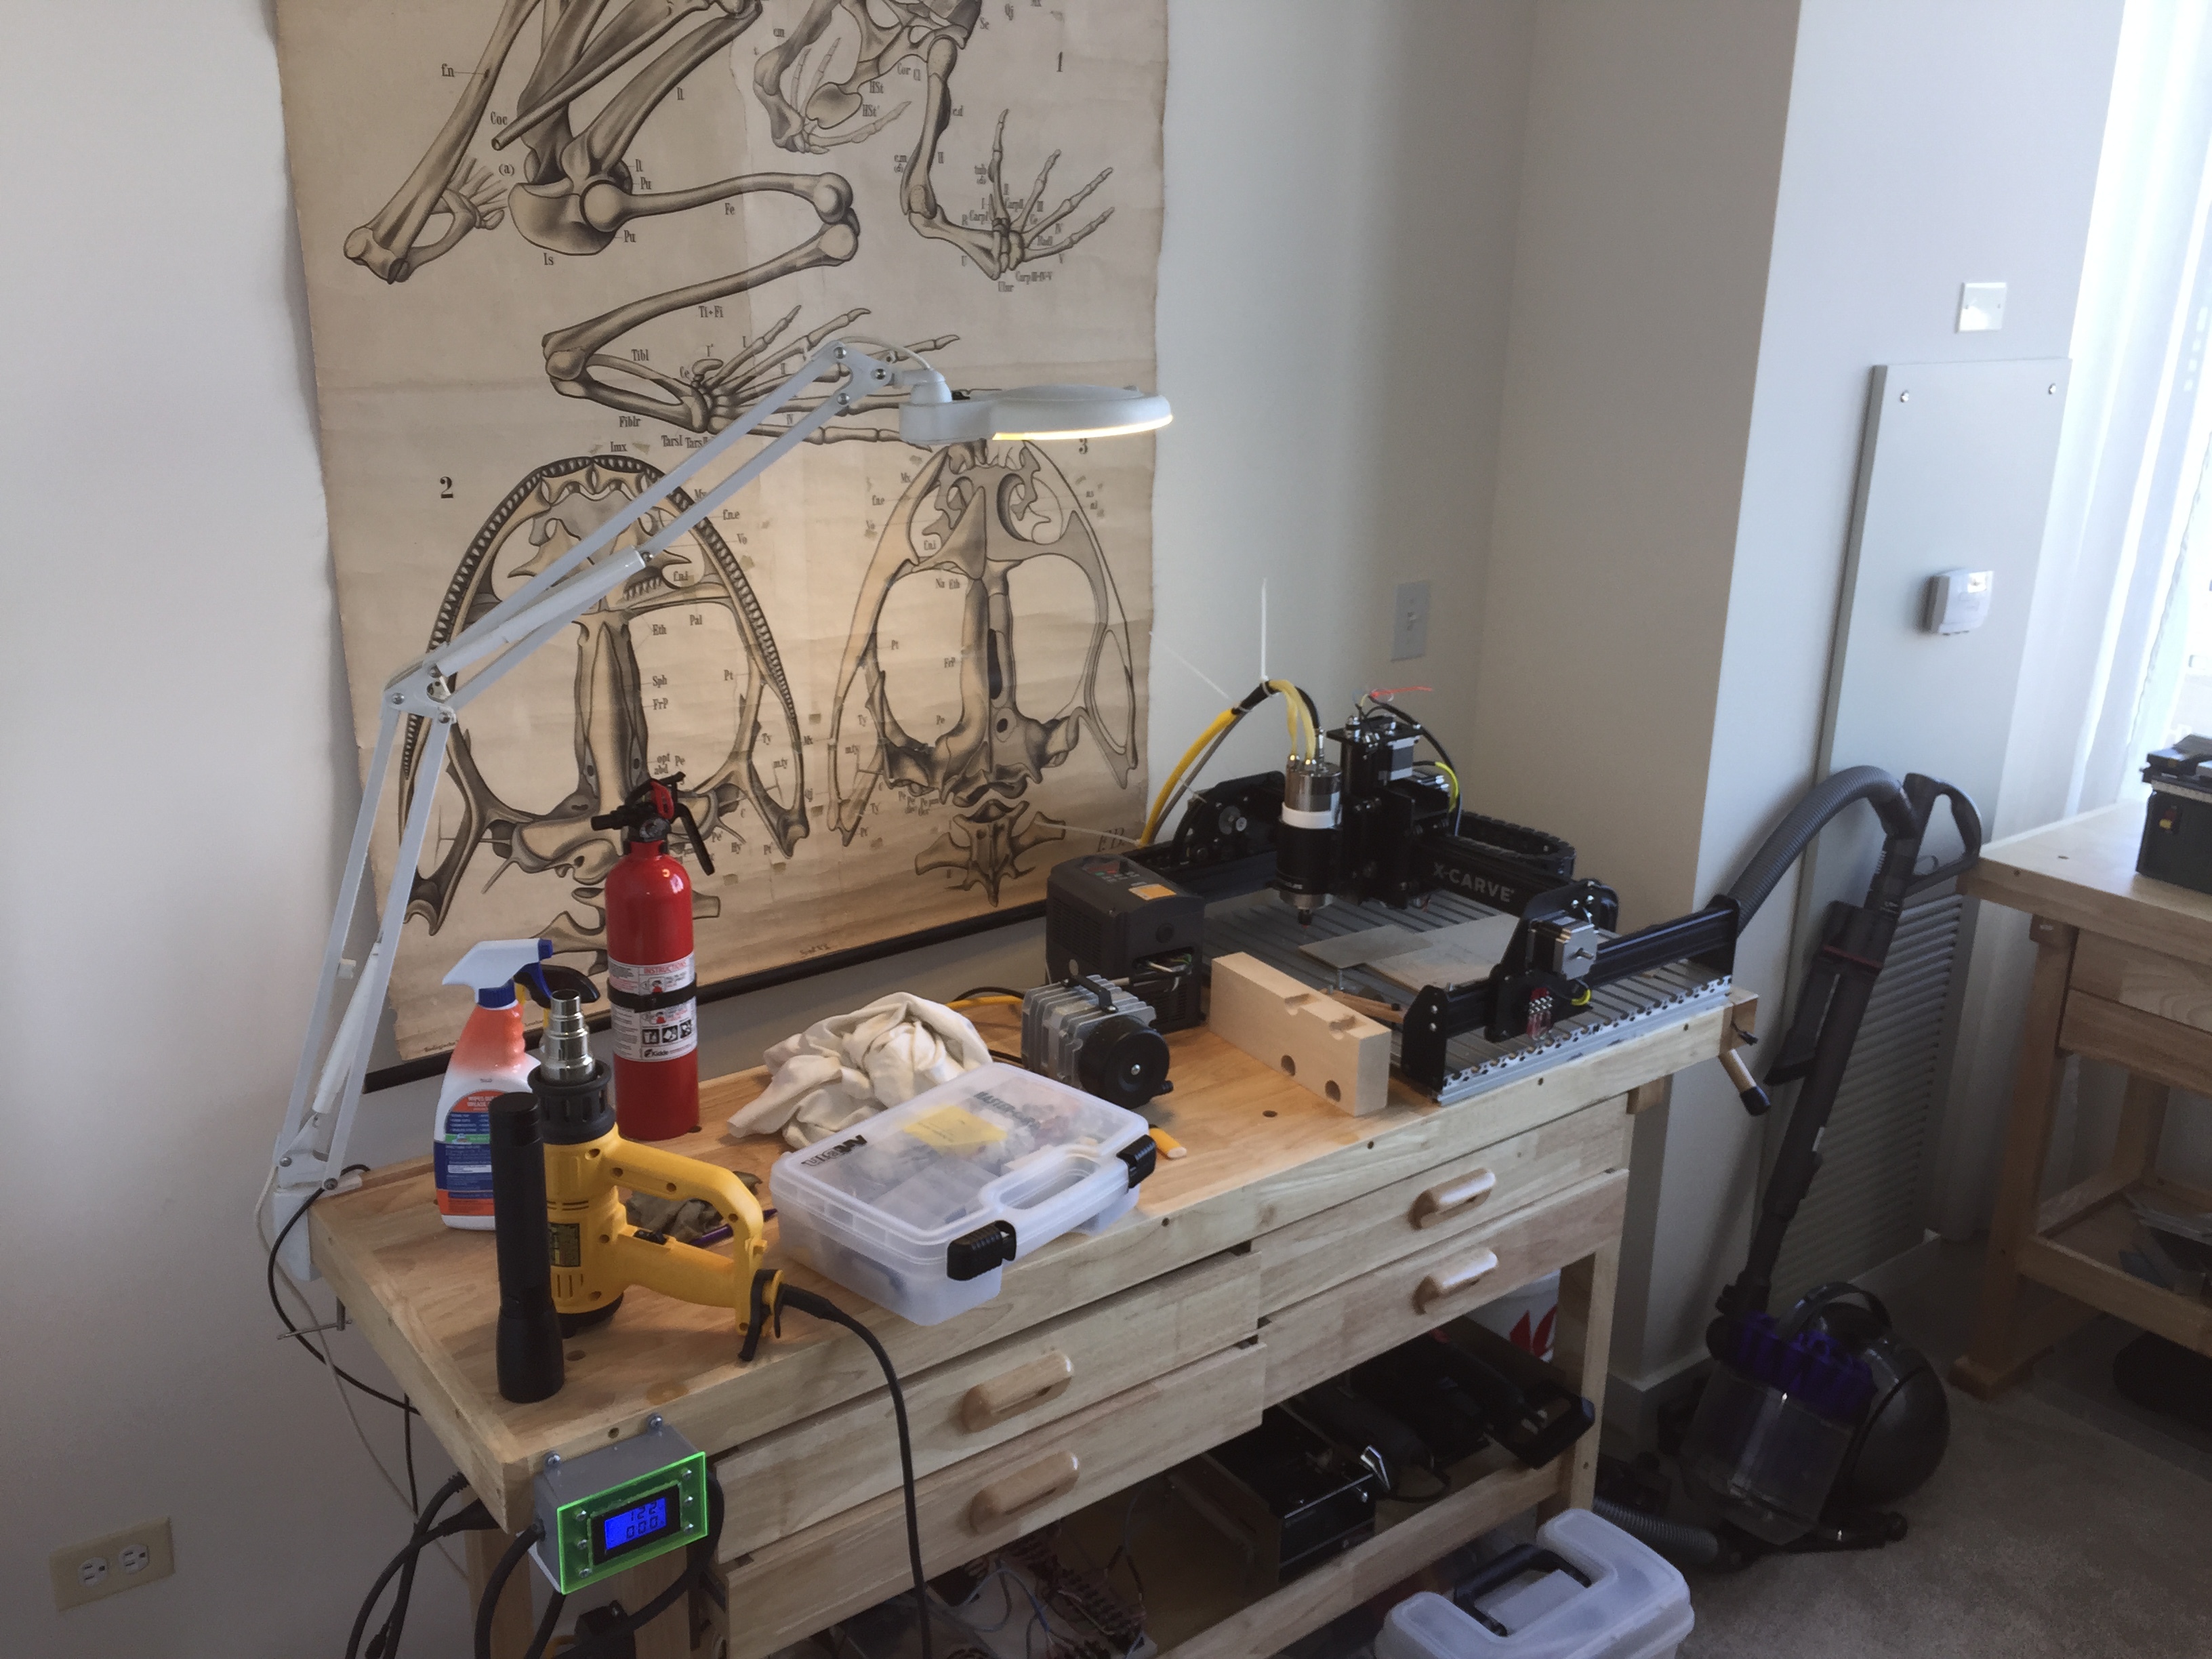
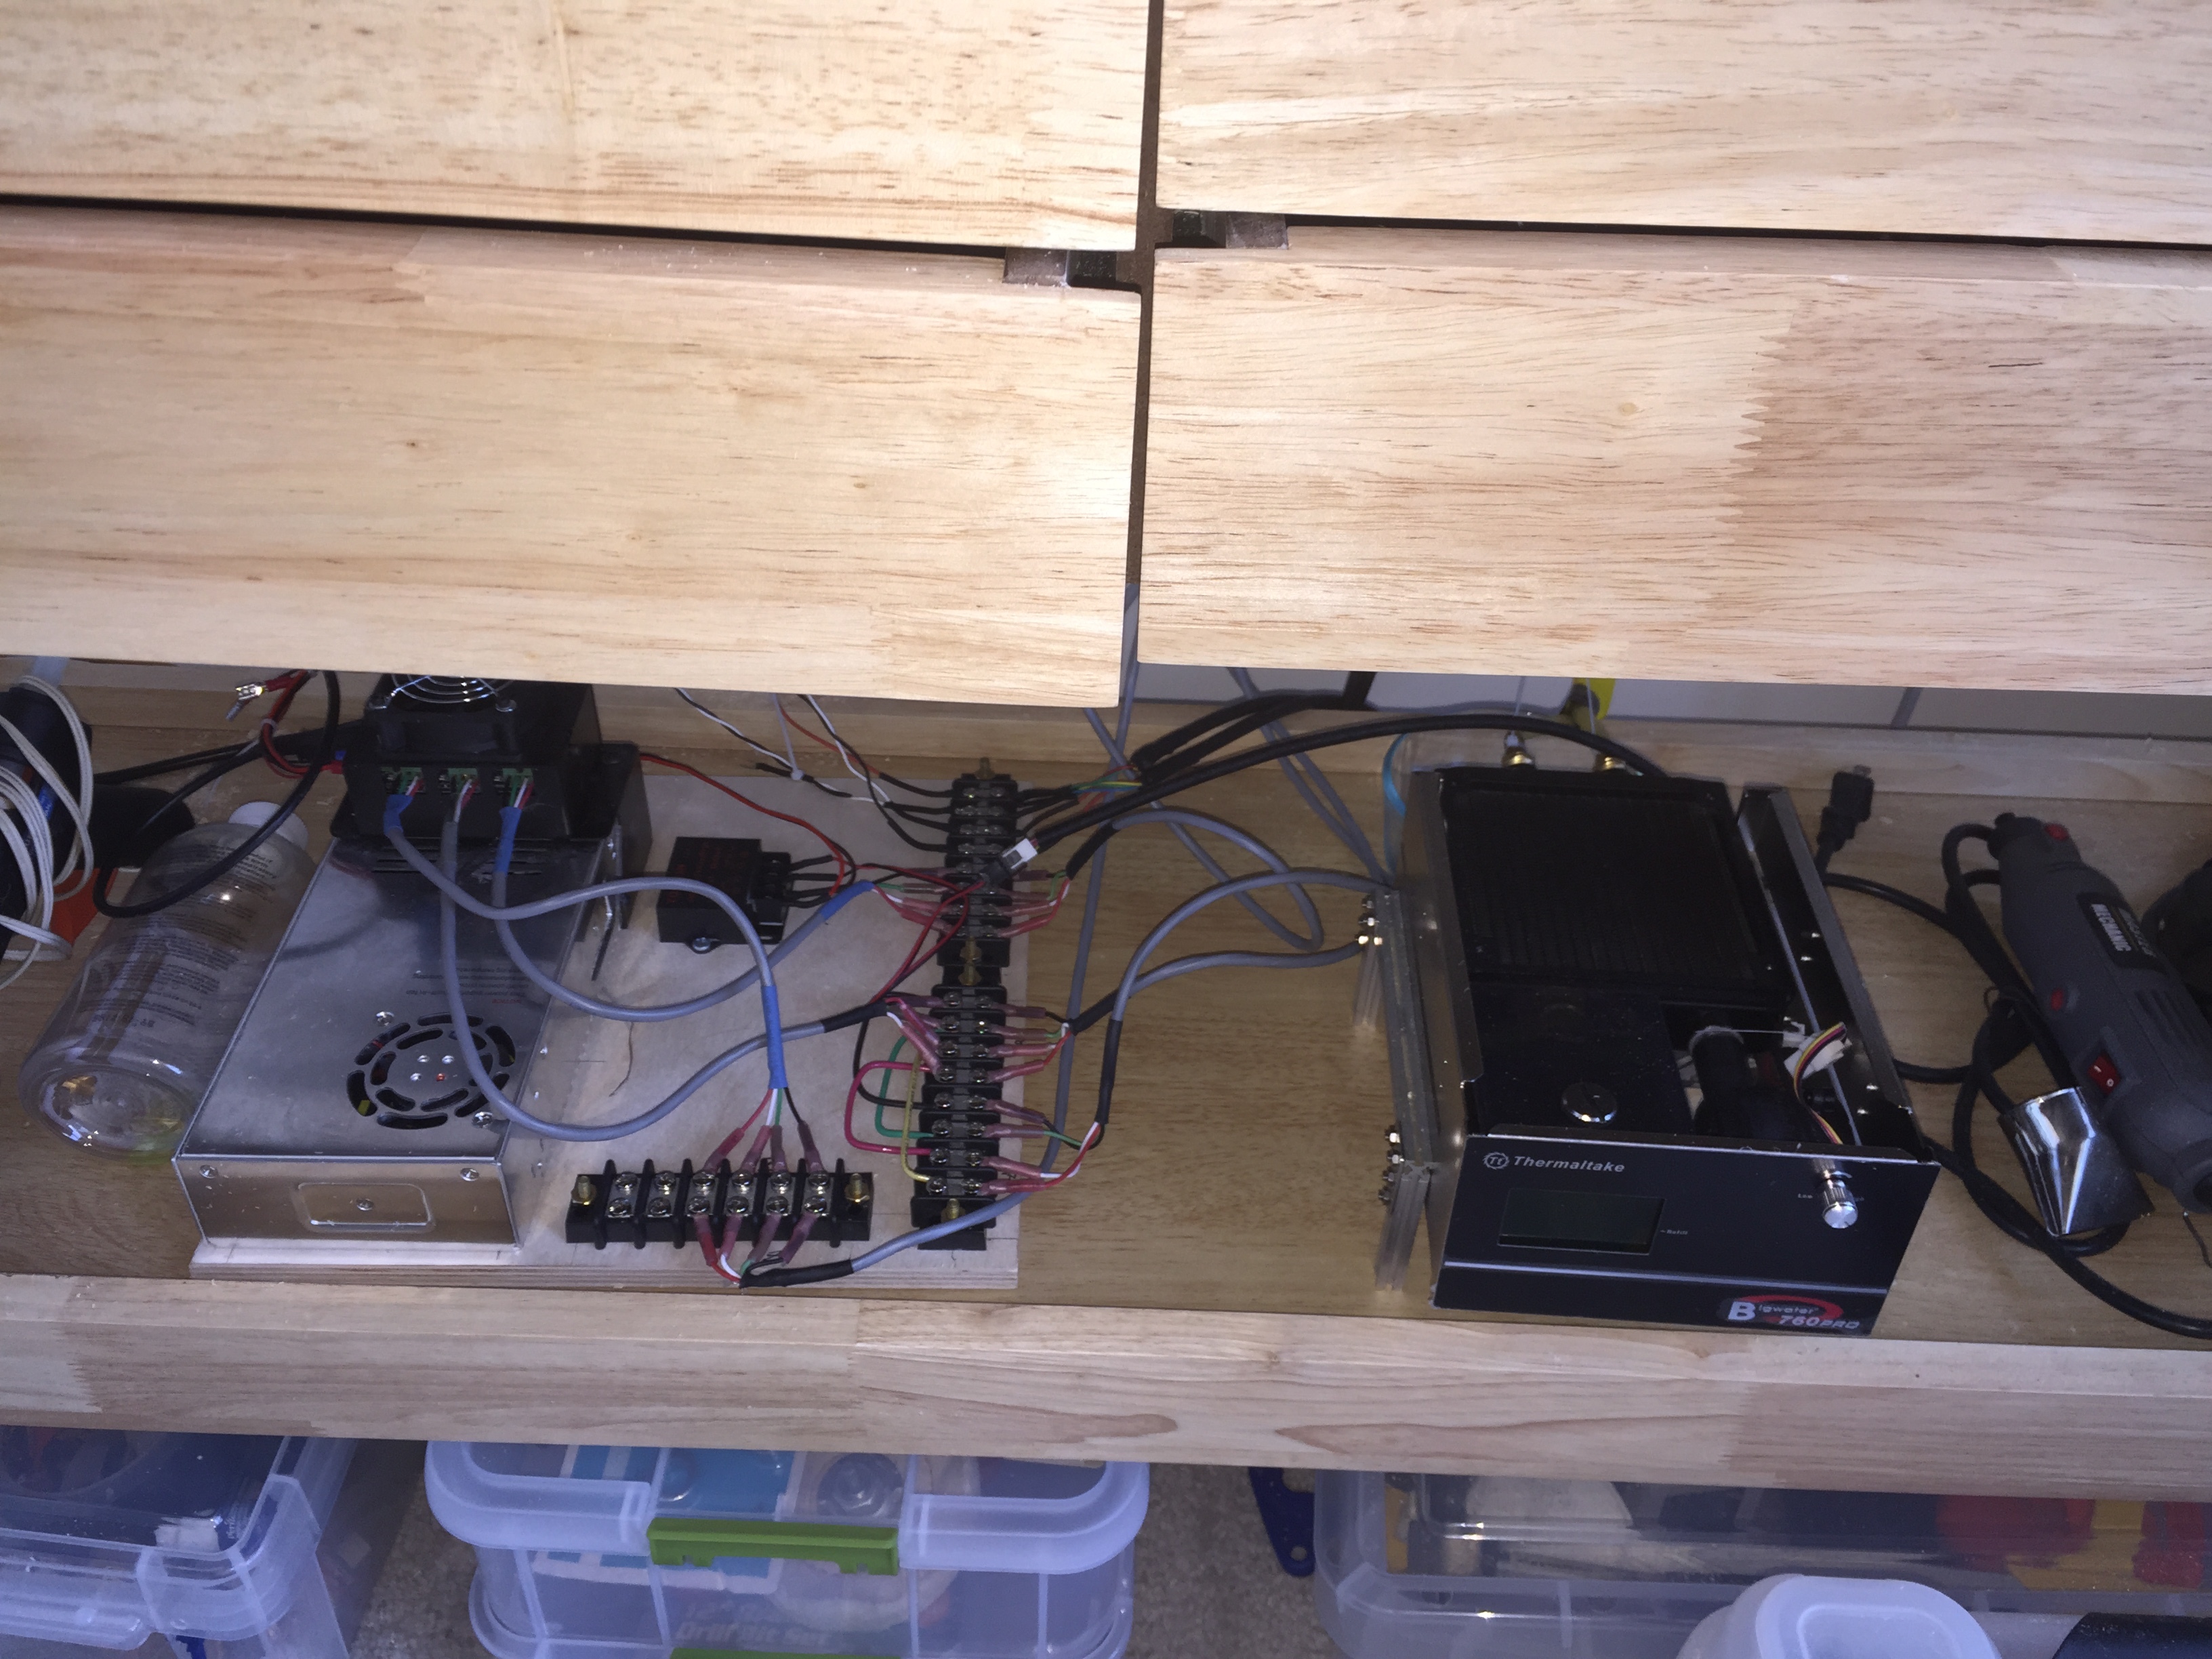
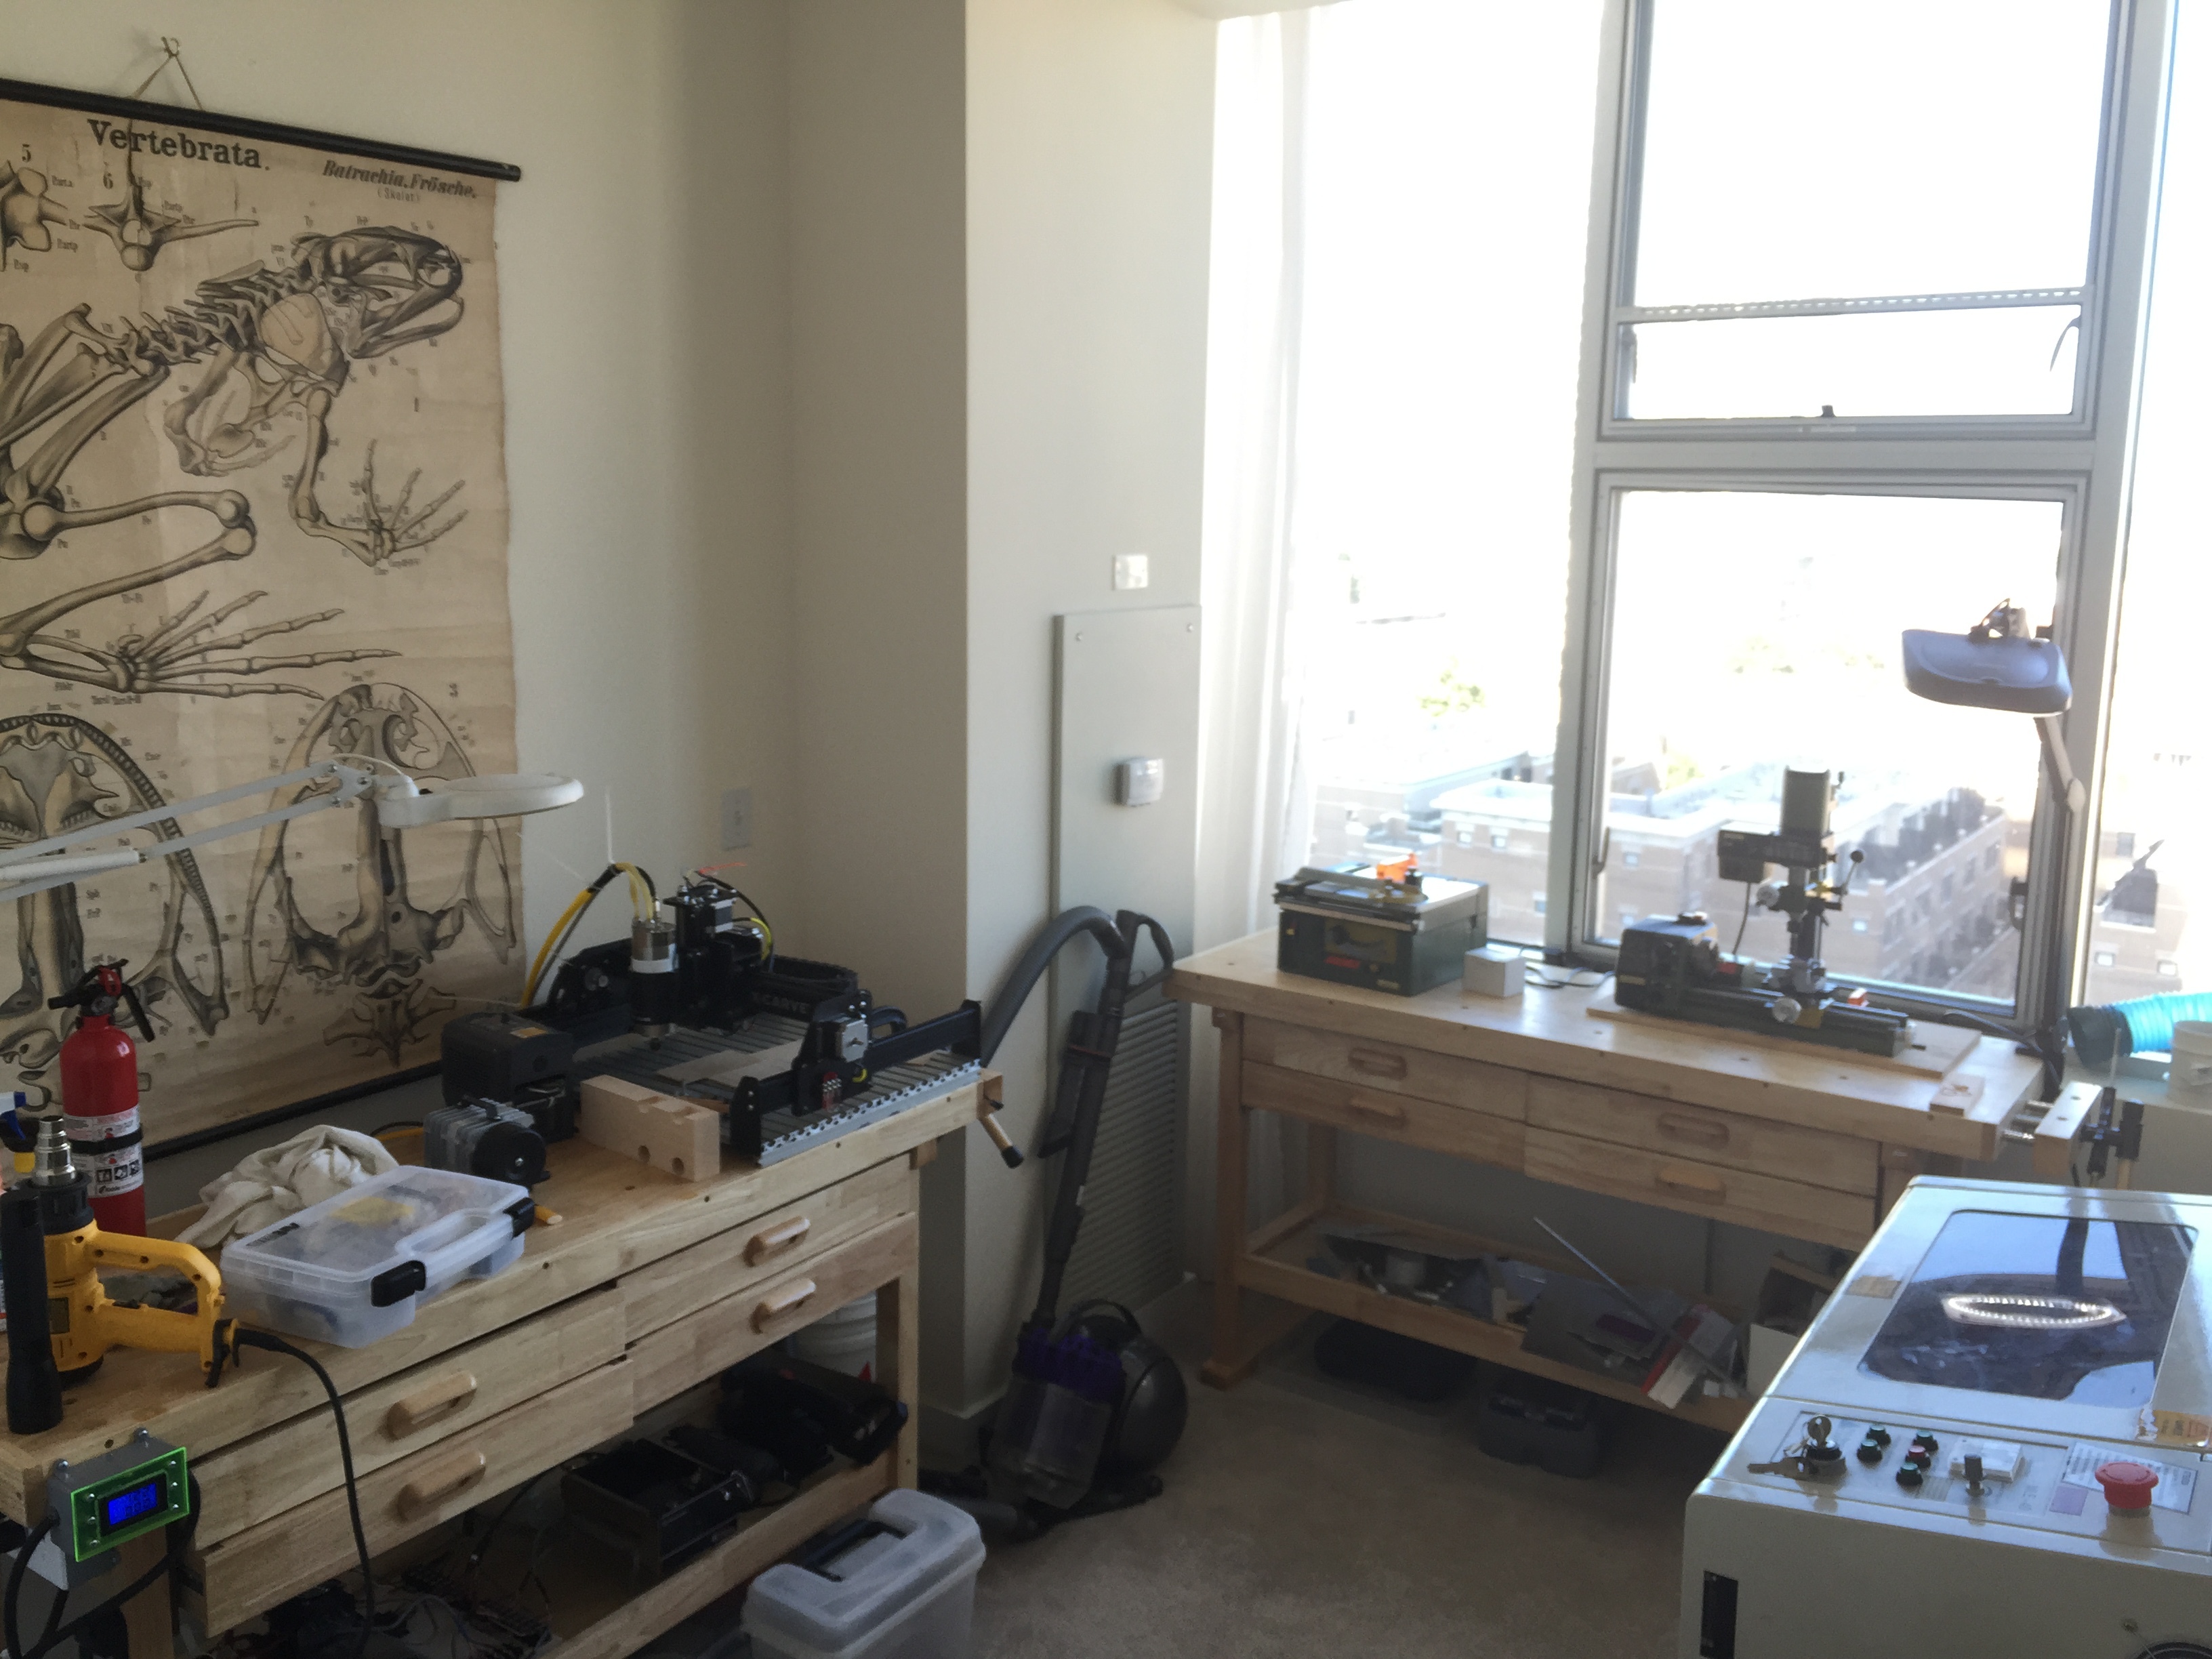
So I thought I would throw my workspace on the thread. I just used a harbor freight workbench. I added some wiring to add a switched outlet (attached to power strip) and current meter. (I didn’t have a nice push-button e-stop switch, but at least there is an easy to reach light switch that shuts down power to the whole system.) The x-carve is clamped down to the workbench. On the bottom shelf I keep the cooling pump/radiator/reservoir unit and the electronics board (which is plywood with all the components, plus terminal blocks, mounted on). I keep the VFD on top so I can easily see the RPM display. Also it keeps the start, stop, and speed controls for the spindle at easy reach.
As my workshop/studio used to be a second bedroom, I still need to replace the ugly white carpeting with something hard and durable. I was planning on putting bamboo down. So far the noise the components produce is very low. The table saw is the loudest, but that is rarely used. It is mostly used to cut stock to size. With the door closed the noise coming out of that room, while the xcarve is running, is no worse than a loud AC unit, and is much less than a vacuum cleaner.
5 Likes
Harbor Freight benches never look this good. Perfect fit.
Got the X Carve installed in the new space and the LEDs added to both sides. About to mill the GX16 pass though panel from 1/8 6061 on the Shapeoko for both mills so the wires can be connected to the X Carve how I want them. Took a bit to design and 3D print the cable chain for the VFD cooling and power cable but it sure does look nice and keep everything out of the way!
Will post a pic of the pass through panel when it is installed later tonight.

8 Likes
Looking good!
Travelphotog, That looks nice! how much does the enclosure cut down on noise levels? I noticed that you didn’t bother to insulate it with any kind of sound dampening material. I’m going to have to make some kind of enclosure like that for mine as well.
it cuts is about 10Db which it pretty good over all. mu sound foam is on the way in the mail right now. I am just going to try and cover the inside top and upper 1/3 of the sides and see how that works. But there is a noticeable reduction in noise when the door is lowered while cutting.
2 Likes