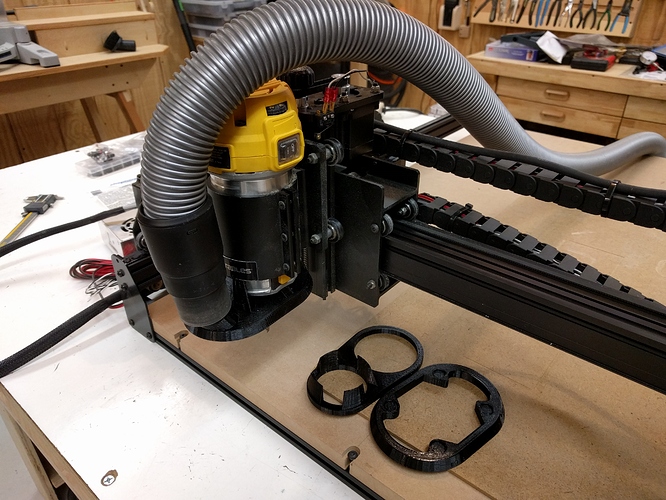
I also make hand turned pens. As a first project after I got the X-Carve was to photograph one pen design I often make with a ruler and then design a form fitting top/bottom box for it in Fusion 360. Then I 3D printed that box, in part to check the fit and it was something I could just start and let run overnight. I then made a design change and printed it again. Once I had the design the way I wanted it I modified the design slightly to flatten the top/bottom pen cavity so it could be milled with a single tool, then used the X-Carve to make it out of cherry. The idea is that once I get it slightly more dialed in I can 3D print the bottom and carve the top, but that’s just an example. Then someday we get to aluminum and then come three material designs.
Overnight I printed the bracket in PETG plastic (should be pretty durable and less brittle than carbon fiber PLA, though with a shiny black finish instead of the cooler matte gray).
I am very happy that the hose connector fits my Festool 36mm non anti-static hose perfectly. The hole in the upper hose support isn’t wide enough for the connector, I’d need the hole to be 56mm or larger. Would it be easy for you to create a slightly bigger model?
I printed the dust body piece first to see if it would fit, that print took just under 4 hours. I printed the other two pieces together which took another 4 hours.
Hi Steve,
Sorry for the delay. I made a slightly larger vacuum ring for you, but from here on out, free files are as far as I’m going with this. I just don’t have time to offer free edits for specific set ups. I hope you understand.
I hope the shoe is working out for you!
Ryan
vacuum ring 56.5mm.stl (57.8 KB)
Thanks, understood, and agreed. I only asked because I thought it would be a trivial edit, and lacking the “source” file my only choice would have been to re-model it or use Meshmixer which I’m not up to speed on to modify the original stl.
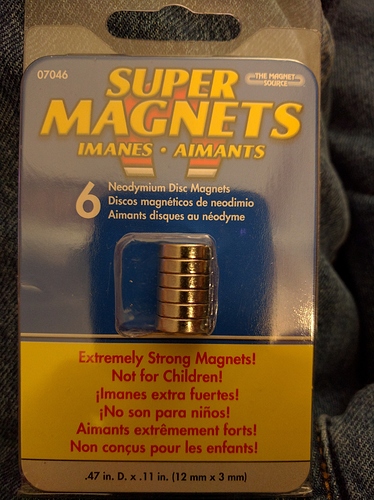
I printed the rest of the shoe over the weekend, but only carved a small thing to try it out. I was VERY impressed with how perfectly the brush fit into the bottom groove, it was a press fit and I suspect it would have stayed in place as is, but I put a dag of hot glue on the corners anyway. I suspect I’ll want to trim the brush a bit shorter, it seemed to reach below the longest bit that I have. The magnets I have were smaller than the holes you designed, so I placed them on one piece set in hot glue, then put wax paper over the first side, put the matching magnets on, then quickly filled the other recesses with hot glue and pressed the whole thing together so everything lined up. It worked well. During that one test I did see the bottom shoe move around a little from the force of the brushes, so I don’t know if that’s normal or whether I need to use bigger magnets for a stronger hold.
I feel that this is really close to perfect, the thing I didn’t like was that when setting home at the top/left/front of the stock I had to do this with the skirt off, then move it a known distance up and away so I could put the skirt on, then move it back. I was thinking of designing a skirt piece that had a hinge on the back and some kind of clasp on the front so the skirt could be put in place around the bit, snapped into the magnets, and the front clasp (maybe even a pin) engaged. My other idea was that maybe a notch in the back of the skirt piece that was just wide enough to let the bit/collet go through it wouldn’t be so bad, though that would weaken the skirt (maybe not a problem) and leave a small spot for dust to escape.
This is a beautiful design. I have the Kent CNC one but am printing one of these out for comparison. Thank you for sharing the source files!
Thanks! Let me know how you think it compares to your Kent!
Hi again,
I think if you use the magnets I sized this for, you’d eliminate the sliding you saw. I’ve got the magnets just shy of the surface of the shoe and just proud of the ring, so the two interlock and can’t slide at all. It has to be pulled straight down to get it to release.
I have the same homing problem… my first thought was that someday they’ll have truly transparent printer filament and I can just print the whole thing clear!
BTW, I’ve spent the last week teaching myself Fusion360. Once I get the hang of it, I think it’s going to be incredible. Thanks for the tip!
Do you remember offhand what are the size of the magnet holes?
If I remember correctly, the magnets were .47 inch diameter and I oversized the holes by 1/128"
Great idea Dan! Never heard of 3D hubs, prices aren’t bad. What type of material did you pick and what micron?
Hey Brad,
I did regular ABS and 100 Microns for a nicer print. It feels nice and solid and I am very happy with it. I had to leave for work before I could put it all together but I’m looking forward to getting it fully assembled.
Not sure where your located but I can give you the person I used in FL if you don’t mind shipping. I also have a 10 dollar off coupon they sent me to share so if you would like that I can post it for you or anyone else.
Dan
If one were looking to (semi-)mass produce these, I’d imagine you could make a silicone mold for everything except where the vacuum hose attaches from a 3d-printed master. Presumably, you could 3D print the only the hose attachment, and come up with some way to affix that to the molded portion.
The 56.5mm variation of the vacuum ring fits my Festool 36mm non anti-static hose perfectly, thanks!
I had similar thoughts as I designed it. I just don’t know if there’s even a semi-mass market for this thing to make it worth it. Especially in the $50 range that I think people are expecting to pay.
Just in case anyone else is overthinking finding the .47" magnets like I was… I couldn’t find that dimension mentioned anywhere online, so I headed to Home Depot to see if I could find 1/2" and adjust the model. Well it turns out they had .47" in stock.
I’m working on a design for a hinged version of the skirt ring for Ryan’s dust shoe. The idea is that it can be opened to slip around the positioned bit without needing to move the bit and then locked up to the shoe with magnets.
If I get this working I’ll share the model like he did.
I’ve read through this thread but I can’t seem to find mention of where the brush was sourced? McMasterCarr? or what size?
Thanks!
Brent S.
Got mine done, thank you so much for the design !


