Awesome. Glad to see things are working out.
Thank you for the kind words Nic. It was a pleasure to work with someone who has an open mind, is willing to listen, and does not think they know it all. The more of these parts you churn out, the better and faster you will get at it. Just keep an eye on the details and bump up those speeds a little at a time until you find the optimum settings. Did you give that single flute bit a try yet? I’m curious about how it performs.
When I first started with CNC I was a total Noob and like you, I reached out to the forum members for help and advice. All the help I received kept me moving forward just as you are now. That is why I am offering the forum members the discount on the Triquetra Touch Plate. My small way of saying thank you.
Charley
Great that you found a way to get your job done!
Just a tiny comment to your fixturing: A good thing is using more fixtures than you think you need, just to make shure your workpiece doesn’t move a thousands. I made a lot of scrap and broken end mills with loosened fixtures (by vibration), and screws in the wooden table are more or less a simple but weak solution. Maybe you could think about milling a few aluminum fixtures to bolt your material down with those screwed inserts, in german they call it Rampa-Muffe or Einschraub-Mutter. It is way faster and safer.
Here is a little file to make this easy (metric but helpful):
Fixtures_X8_M5_M8_new.dxf (174.9 KB)
Great to see that interaction on the forum leads to a solution. This post definately helps in understanding what is important for milling aluminum. Thanks for the pictures, very inspiring.
Finally finished! Went to .003 feed rate but I’m pretty sure I could go higher. I didn’t want to chance it on this panel, but I’ll keep working at it and see where the quality starts to fade and then back it off. Anyway, thanks everyone!
(EDIT: Take a look at my first panel photo, then this one. See the difference in mounting points? Turns out that because the panel is so big, it bows up all over the place. Even the few panels I had with some mounts in the center still didn’t have enough clamping force. Finally, I decided to put holes EVERYWHERE and throw wood screws every few inches. That made all the difference. You could hear the difference. Its night and day. I could walk away and still hear a clean cut going on in the back ground. From now on, I’ll skip cutting big holes out of the big areas and just drop screws down all along the toolpaths)
i would like to see it when you installed in the airplane with all instrument panels.
Two things:
Firstly, I love that this has worked out for you. The value of this forum is amazing - I for one wouldn’t have much more than a fancy router without the knowledge I’ve gotten, and continue to get from here. Just this post alone has given me info on what I’ll be cutting this weekend.
Secondly, you’ve made me feel totally inadequate. Making stuff for your helicopter that’s sitting in the background kinda trumps everything…

You go it! Should be done end of next week. I still have to make an acrylic overlay so… Can you guess what my next help topic is going to be about? haha 
Thanks! I don’t really fell like I’m making anything cool or exciting like most people here do. It’s just a flat piece of metal with holes cut in it. Basically I fumbled my way through using a machine that was designed to do this so… But hey, it works! haha…
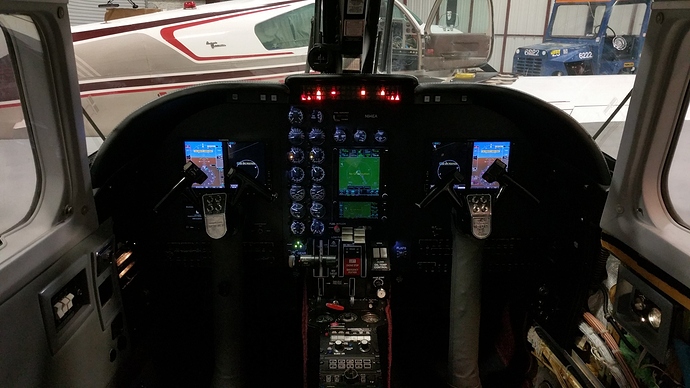
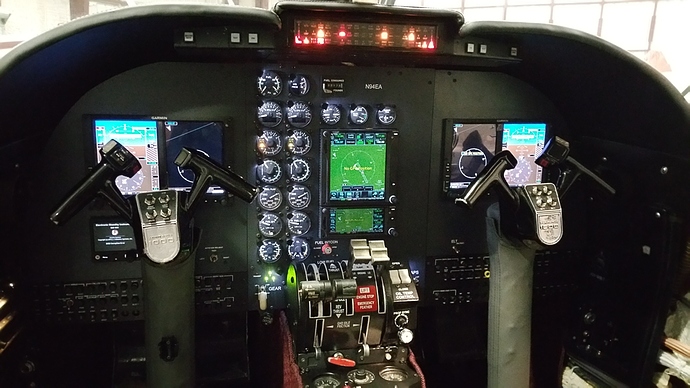
Until I can share the install of this panel, my first ever machined part, here’s one I installed recently that an outside vendor made from my cad drawings. It’s a 3 piece panel, .09 aluminum, and took 3 weeks to get. And then the customer requested some changes which took another 2 weeks on rush order. So… the fact I built this one panel in less than a day is EXTREMELY valuable to this shop for turning aircraft on time (and now early)… I need a bonus for coming up with the idea and then making it a reality! 
On a side note, what you don’t see in these photos is the acrylic switching panel overlays on the ceiling. I’m pretty excited to be making those now too! Hopefully soon i’ll be able to share a lot more stuff with you guys.
I am so happy that you are on track to getting these panels out the way you had hoped for. Well done my friend, well done!!
Charley,. You da man!
options:
- Make more passes if you do not want to reduce speed to reduce friction.
- Reduce forward speed and rpm increase.
- Use Cooling: if water is treated aluminum or aluminum oil if untreated.
- In case of failure stop work, raise in manual mode and edit code G to follow where stood first verifying the good condition of the tool.
- check position of material, this can be moved.
(Sorry by my english XD )
Hello, I know this is an old thread but if you see this, could you please share how you stiffened your y-axis? I was hoping to know if you used an existing plate that has the holes correctly spaced already. Thank you in advance.


