@Scotts Thanks for this! I will take a gander at these. Definitely will save some time.
That would work for me
Scotts,
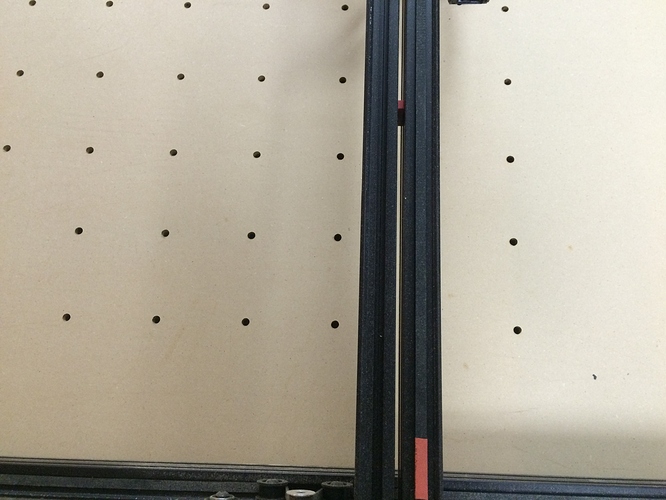
Loading your dxf to be cut on my ShopBot, its seems that the grid holes have all shifted down.
-Troy
I have the larger 1000 x 1000 machine. I did my board a little different. I cut the board to 1000 x 1000 but could only use 1\2 due to the wheel clearance. I ordered an extra square tube and cut it to size so I have a total of 4 rails not three under the board. I drilled my holes, counter sunk the screws and attached the pre-assembly nuts to the bottom of the board. Then slid the nuts into the rails making sure I had nuts for the corner supports in their proper places.It was not easy and like I said ended up with only 1\2" board and not the 3/4" board. Then by moving the rails by hand I was able to make straight lines that were square to the machine on the board and then drilled all my hold down t-nut locations. Went really fast. only about 1/2 to mark and drill the holes. I did not need all 144 holes since the machine does not reach into all areas and I spaced my lines out to be 2" I think. The recess on the back side of the board is no big things since it will not be seen so why waste time. I am going to mark my lines with a really small tip and only about .01 or .1 deep, run some pain in there and I will be done. Do not have a laser yet. Good luck.
Wheel clearance shouldn’t be a problem with 18mm MDF (3/4") unless the board is cut too big.
Correct size for the spoil board is 940mm x 998mm.
@TroyHammonds I used the pdf to draw the file out. The lower holes look close to the mounting holes to me but I double checked and that is how it was drawn. Are you able to attach a screen shot of how it looks on your monitor? The SketchUp file was half the size of the dxf so I wonder if it converted the circles into lines. I have a friend taking a look at it and trying to convert it with their software.
Well the svg file was too much for my browser so I created my own Easel template for drilling holes. I only drilled an 11x11 grid at the standard 70mm spacing. I will drill the other 22 holes by hand. But the grid looks nice and I’m busy fabricating a housing for my JTech laser / fan mount to engrave the grid. Here’s some pics of the drilled grid. I’ll share out the Easel file soon.
Ok here’s the Easel file: Waste Board Drillin’
Set the bit size to 0.245 inch if you are using a 1/4" drill bit. This fools Easel into carving the holes in one pass. Otherwise it will complain that the bit is too big. I thought about adding counter sink holes but I was getting sick of drawing and not milling. I’ll countersink the holes by hand.
Thanks for sharing your file. I had a friend look at the svg and dxf files. When SketchUp exported them, it converted the circles to individual lines. I wasn’t able to get Easel to load the svg but we are running on an air card so I thought that might be the issue. Can’t wait until my X-Carve arrives!
Just so everyone knows this is not an identical pattern to the factory waste board. The holes should be about 30mm to the right of the origin (0,0). I chose to use the X-carve to drill the holes so they are shifted compared to the official CAD drawings. For my use I didn’t care about where the clamps will go. If you want a 1-1 factory waste board you will need to drill the perimeter holes by hand.
Been working on mounting the laser to the machine. After watching the 80W laser at work making tons of smoke and fumes during its operations I decided to fashion a mount with sufficient cooling / ventilation. Its still a work in progress but so far everything fits together well. I have yet to mount this version on the machine but previous versions fit well. You can find the files with this link.
I have ordered a Delta 120CFM 80mm fan for the project. I don’t think a smaller computer fan will cut it.
Goeff. I did cut my board bigger. Like i said it is 1000 x 1000mm. I just did it different to maxamize my cutting area. No big deal. I have to move mine once in a while and 3/4 noard is alot heavier whan attached to another board to keep things square when i do have to move it…
I’m getting closer to finishing the waste board. Laser is operational and I’m testing the graphic pattern. Having some issues with horizontal lines being rendered but I should have a handle on it soon.
A sample of where I’m at with this process:
As you can see the horizontal grid lines are missing. The scale is off too by about 1.6mm per step.
But its almost there!!
Looks great so far! Please keep us posted on your progress. I have a laser on order and looking forward to trying this as well. Thanks.
@DavidSell what did you use for a bit? I am carving my waste board now based on your file (thanks for sharing). I am using a 1/4" drill bit since the shank fits the router. I have the router speed set to 2 but it is burning the wood a bit. I’ve got a tapered bit (v cut) that I will use for the bevels and set it to an outline cut.
I only had a 1/4" 4 flute flat bottom upcut bit in my inventory. Probably the wrong bit to use but it didn’t smoke much and I ran it at 3-4 on the 611 router. The wasteboard is very fine in composition so this may be why the bit works so well.
V-bit is a good idea for the countersink. I may have to try that.
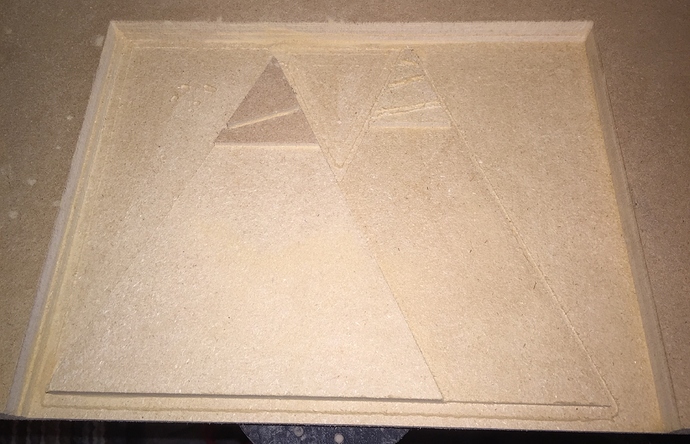
I had the v bit set to outline on the line and do a depth of 3 or 5mm. I had to play with it a bit to get the bevel I wanted, it’s bigger than the drawing but was fun to experiment. I was using a feed of 1.8mm and speed of 1200. It worked well for me. I did a carve the other day with those speeds and there were no issues (2 flute down cut 1/8" bit). I m sure I could have been more aggressive but it was the first time running it. My kid drew me a photo so we did it in easel and set some depths.
I made my own board. 3/4" plywood. Cheaper and lighter than mdf and won’t sag as bad over time. Used 4 pieces of steel unistrut to reinforce the back side under machine.
My waste board is set up a little different. I am using it to mass produce the same parts over and over from the same sized materials, so I added a fence to mine, and drilled my holes for the inserts (bought on Amazon $7 for 100) in concentric arcs from 0,0.
The holes are positioned in such a way that there is always a hole 1/2" -1" from the edge of the piece, and I use 4 Fibonacci clamps to hold the piece against the fence.
I can have my blanks prepped (12 at a time) and have a finished piece swapped out with a new blank, have it perfectly zeroed and straight in less than 10 seconds.
This is awesome! I have the stock wasteboard but this makes me wish I had drilled my own. Too often my work pieces end up just out of reach of the hole. Great solution!
I, too, have things that I cut from the same blanks repeatedly. I run the machine 15 in up take out the finished piece, drop in a new piece and clamp it, run the machine back 15 in and set my new depth and I 'm good to go a less than a minute.
Bumper boards make a huge difference. I used to have one going in the y but right now I just use the one for the x and always line up my board with one of the lines screen printed on the wasteboard for my side to guide. I also made a full length clamp for the x that goes through my bumper board, these kind of things make a huge difference.
I used a 1/4" bit and ran it at 1 on Dewalt, and it makes a whine near the end. Worried the bit will break or something is going wrong. Advice here folks? Should I turn up the Dewalt? Thanks.


